Sunday, December 27, 2009

Layout Progress as of 12/27/2009

Today marked the completion of the first week (out of eight total weeks) of the Second Annual International Winter Layout Party on TrainBoard. Progress continues on the Emerson, GA scene of the layout as shown in the series of photos below.

» Photos


I am using the cardboard web method to support the hardshell scenery. This is the first layout I have ever actually added scenery to, and I have found I really like this approach. It goes together very quickly, allows you to see what the final terrain contours will look like, and is easy to modify if needed. This first photo was posted last week and shows the initial section of cardboard web installed on the layout:


However, after looking at prototype photos of the area, I realized that the hills behind the track were a bit too high. So, I simply ripped out this section of cardboard web and redid it. This photo was taken from the same angle as the first one--notice how the hills behind the tracks have been lowered:


Here is another photo of the same area looking in the opposite direction. There will be a rock cut in the middle distance, adjacent to the turnout for the south end of the Emerson passing siding:


This final photo shows the extent of the cardboard web so far. The void in the foreground is where the I-75 underpass will be. I need to add some framing to support the highway and the overpass, then I need to cut the appropriate profile in the fascia:


.

Wednesday, December 23, 2009

Layout Progress as of 12/23/2009

This week I have continued working on my to-do list posted on the Second Annual International Winter Layout Party on TrainBoard. I have included a series of photos below to show the progress that has been completed since the last update. This is my first real model railroad layout (to go along with the dozens that I have completed inside my head over the years), and I am really starting to be amazed at how it is coming together, especially when I see it in photos. I owe a huge debt of gratitude to the numerous modelers who have helped out along the way. I will have to stop and give due credit at some point, but for now...thanks everyone!

» Photos


Painting the fascia the same color as the room walls really makes this part of the layout "pop." The old plastic drop cloth hanging down below the layout will soon be removed and black skirting will be installed in its place:


Here is a low angle shot of a northbound train entering the layout from south staging. You can see where I have begun to install the cardboard lattice that will support the hardshell scenery. You can also see one of the fascia mounted rocker switches used to control turnouts, in this case the one at the south end of the Emerson passing siding:


Here is a higher and wider angle of the same train shown in the previous photo. The scraps of blue foam have been glued in place protect the spring wire coming up from the Tortoise turnout motor to the throw bar in the turnout. I have also begun to build up the area around the throwbar with cork roadbed so it will no longer be suspended in midair:


This photo shows the current extent of the cardboard lattice. The lattice follows the background hill profile, which has been drawn onto the backdrop using blue chalk. This chalk line is very difficult to remove, as you can tell by the smudges left behind by an earlier failed attempt to draw the hill profile. I will need to paint over these smudges with the standard sky blue backdrop color:


.

Sunday, December 20, 2009

Layout Progress as of 12/20/2009

This past week, TrainBoard announced the Second Annual International Winter Layout Party. WLP 2009-10 is an eight week program where model railroaders get together and publish their goals for the eight weeks. Each week, members post updates and comment on other member's progress. It is a lot of fun and a good way to get motivated and get some stuff done on your layout. WLP 2009-10 is a follow-up to the very successful First Annual International Winter Layout Party. I have been a member of TrainBoard for a few years now and have found it to be one of the best online model railroad communities, especially for N-scalers such as myself.

For the new layout party, my goals are to complete an extreme transformation of the Emerson, GA scene:
  • Prime & paint fascia.
  • Replace temporary turnout controls with permanent ones mounted in the fascia.
  • Frame out the supports needed for the I-75 underpass.
  • Install hardshell terrain (cardboard web + plaster cloth + paint + texture) on the ENTIRE scene.
  • Extra Credit: Paint tree line and distant hills on the backdrop.
I have already started working on the task list above. Today, I primed the fascia that I installed last weekend. I have included some updated photos of the layout.

» Photos


In this photo, you can see how I prepped the fascia for priming by filling in any abandoned screw holes leftover from when I was experimenting with positioning the fascia. This photo also shows one of the three 3/4" holes that I bored into the fascia to accommodate the rocker switches that will control the turnout motors:


Before priming the fascia, I also installed vinyl panel molding along the cut edges of the fascia and in the seams where two sections of the fascia come together. This molding gives the fascia a nice finished look and does a good job of hiding any imperfections in the raw cut lines:


Here is the fascia after two coats of primer have been applied. Applying primer to the hardboard used to construct the fascia and backdrop results in a smooth, even top coat and vibrant colors when the top coat is applied:


.

Sunday, December 13, 2009

Layout Progress as of 12/13/2009

After an extended time away from the layout due to work, family, and a bout of temporary insanity while I considered switching locales, railroads and eras, construction has resumed on the N-scale CSX Dixie Line layout. I have decided to move forward with construction in the town of Emerson, GA even before the trackwork has been completed on the rest of the layout. This weekend, I completed all of the fascia in this section of the layout.

Before installing the fascia, I had to add some supports along the front of the layout where the scenery will extend a bit into the aisle. While the construction worked out just fine, I discovered that extending the layout in this manner really encroaches on aisle space. Even though I only extended a mere 3" into the aisle at two points, I found that my aisle that was comfortably wide at 30" is not so comfortable at 27". While I never had a problem with aisle width before, now I find myself brushing against the new fascia from time to time in the two spots where it bows out into the aisle. All of my controls will be recessed so I do not anticipate any problems, but I have learned my lesson well and from now on the aisle boundaries are off limits for expansion.

» Photos


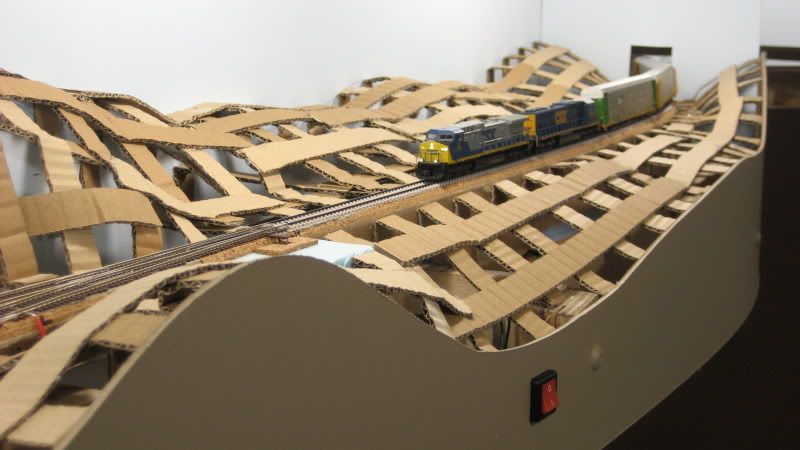
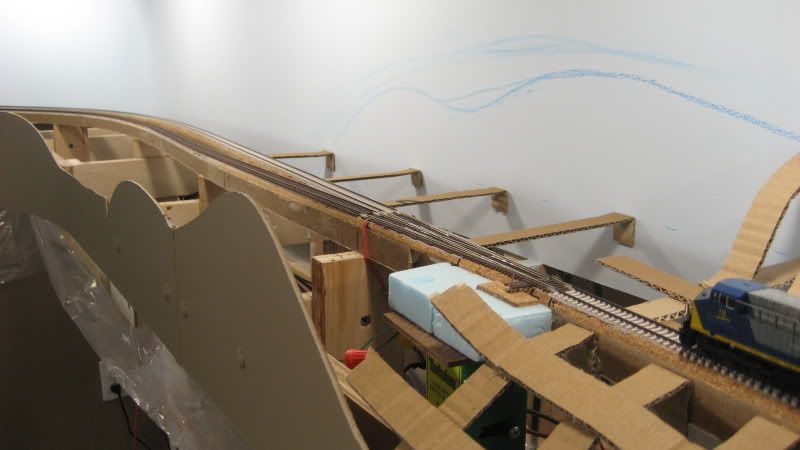
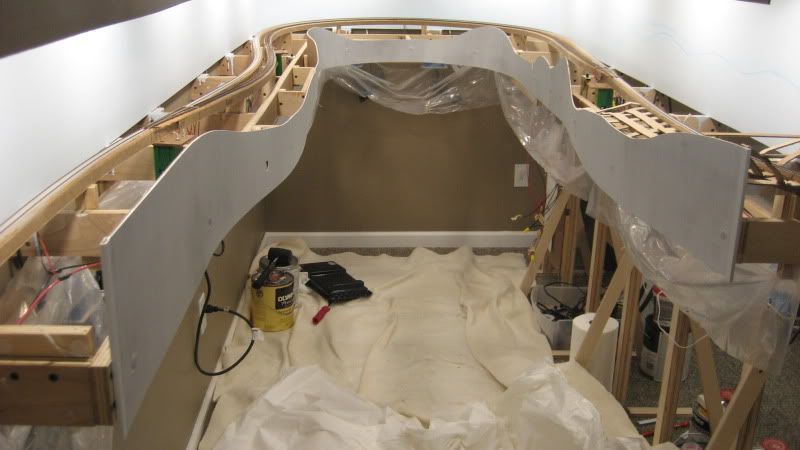
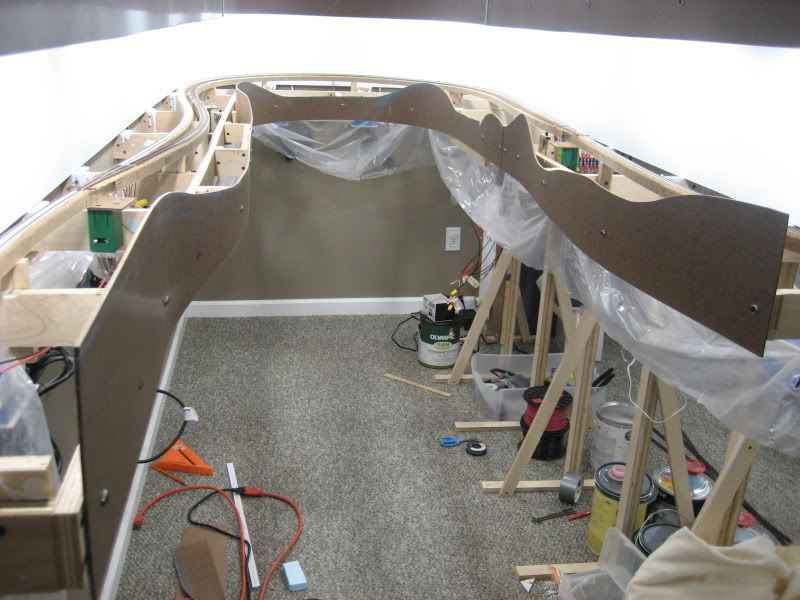
In this picture, you can see how I used 8" wide strips of hardboard screwed to the front boards of the benchwork. The hardboard extends 1" below the front boards. You can also see where I have drawn the profile of the hills using blue chalk:


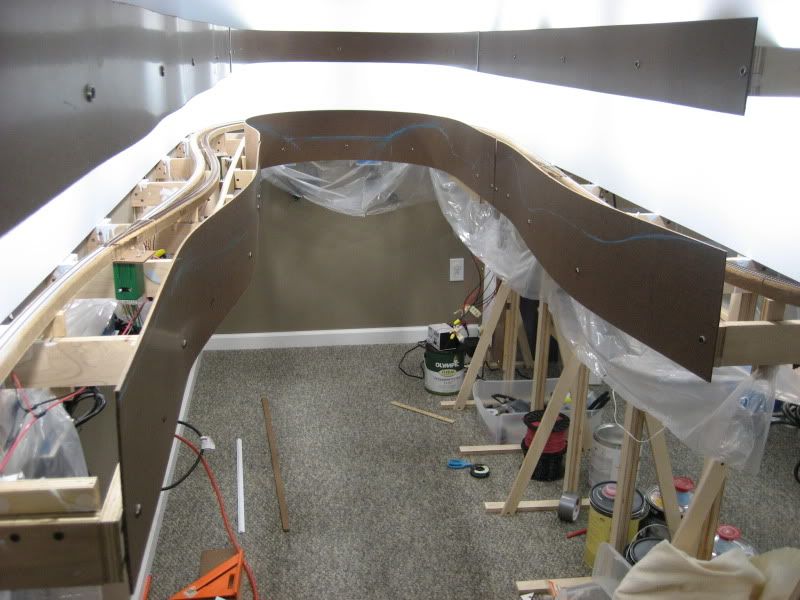
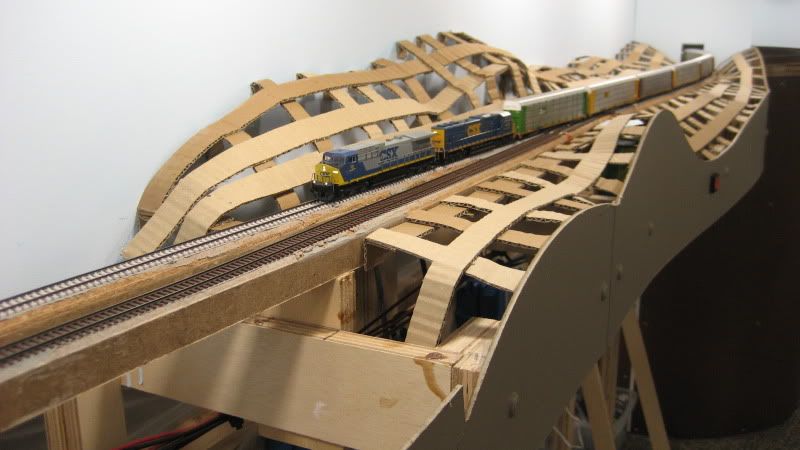
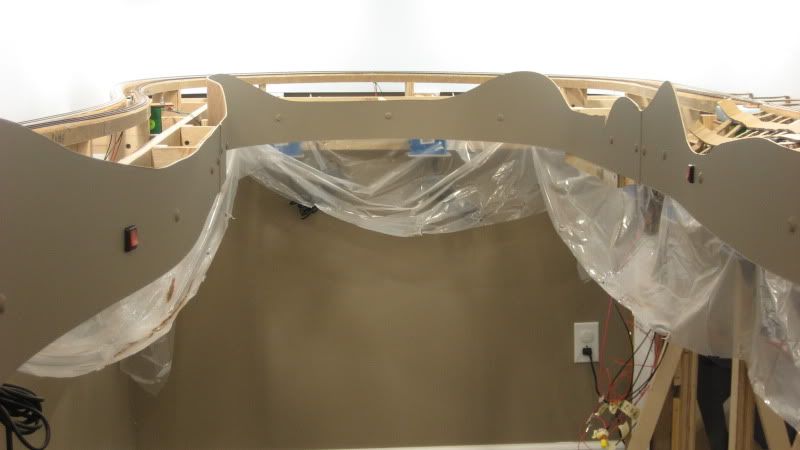
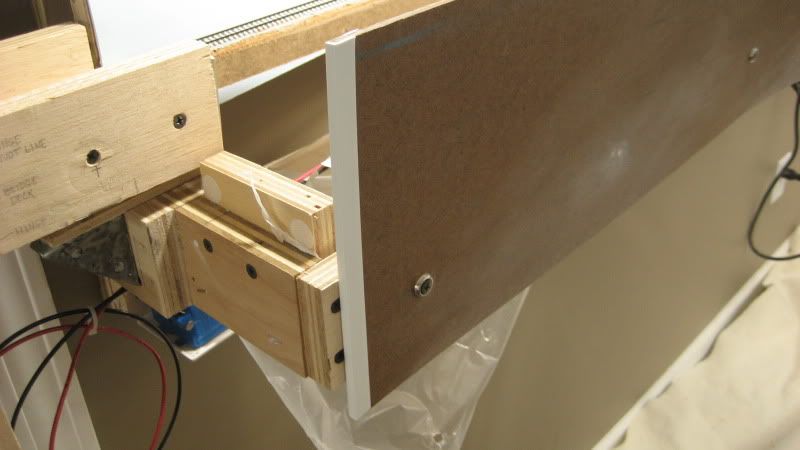
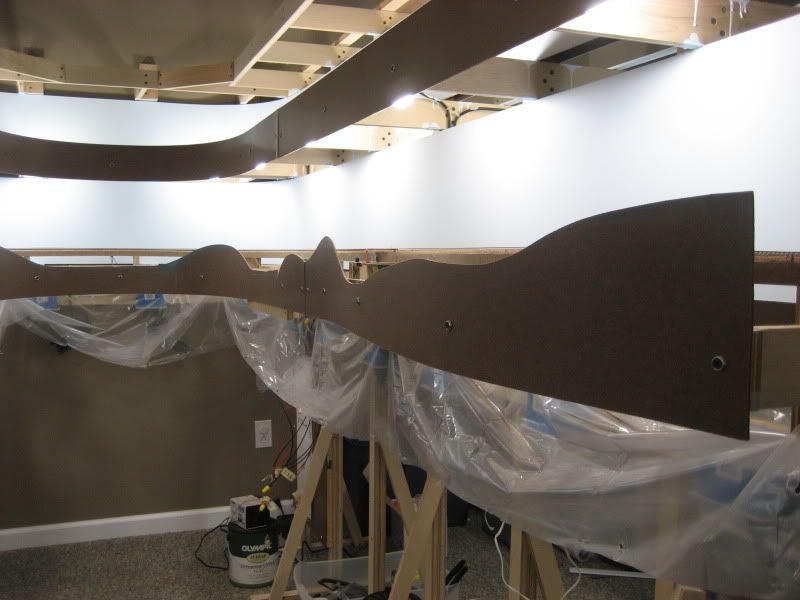
These two views show how the fascia bows away from the benchwork in two locations where the layout was extended into the aisle. Note the special brackets used to support the fascia in these areas:


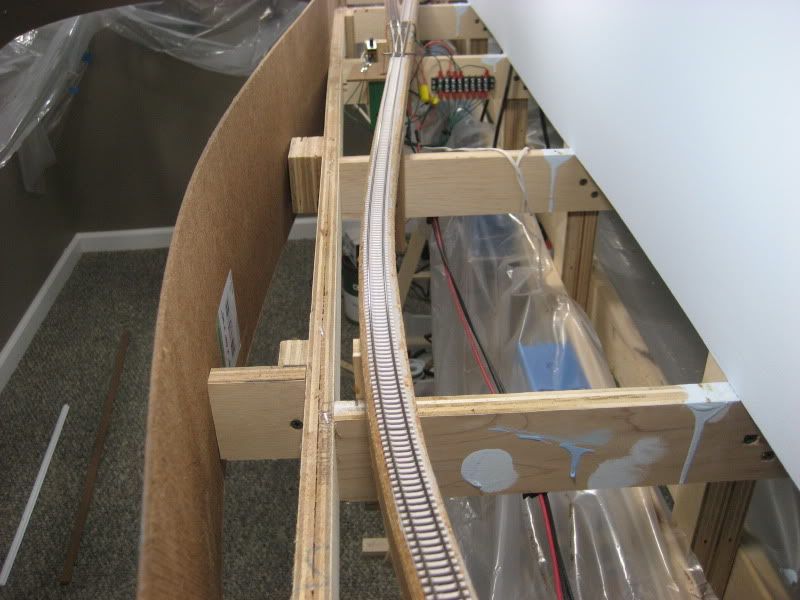
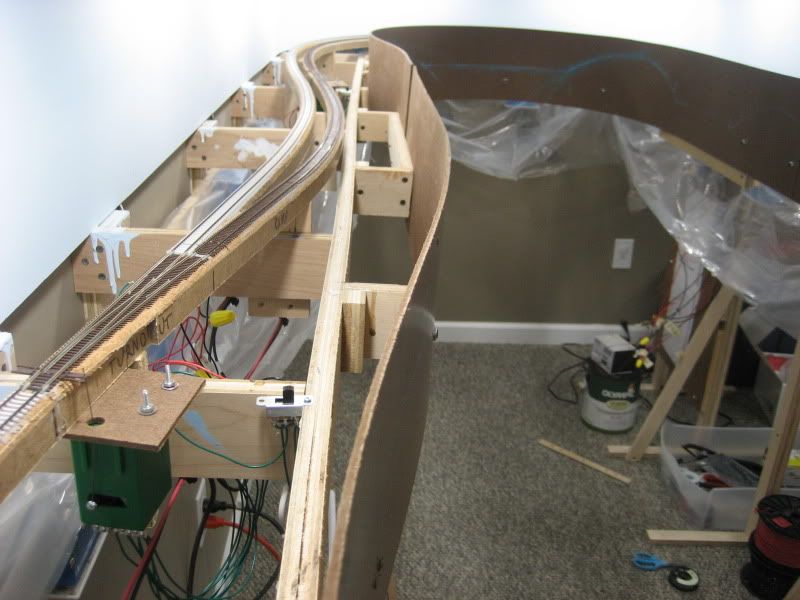
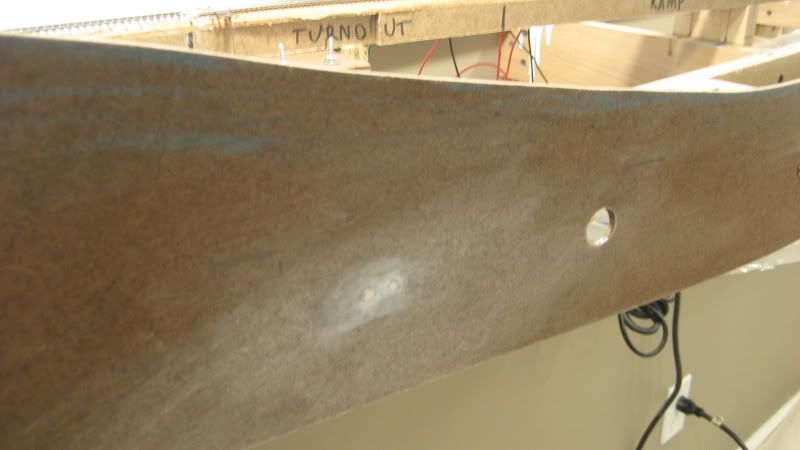
Finally, I used a sabre saw fitted with a metal cutting blade to cut the hill profiles on the fascia:


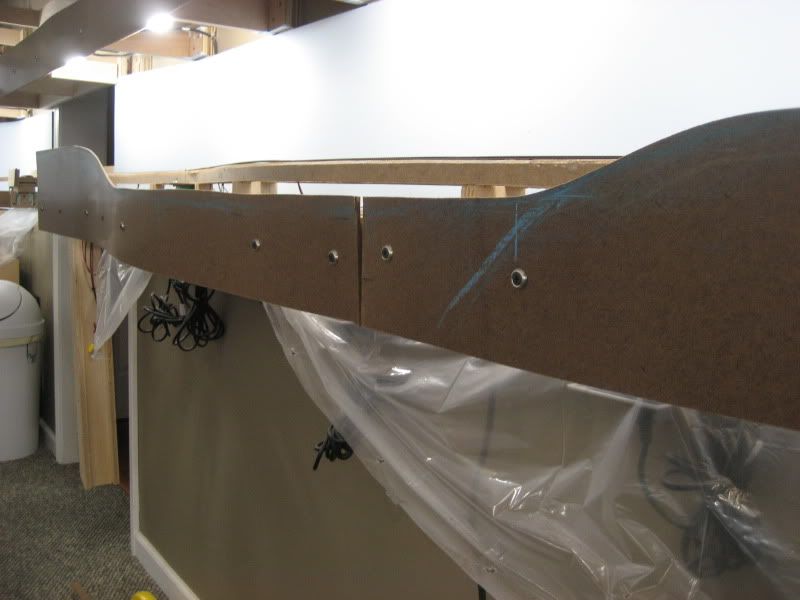
The gaps in the fascia where two pieces of hardboard meet will be filled by panel molding strips and will blend in nicely once everything gets primed and painted. I also need to go back and redo some of the screws holding the fascia on to the benchwork. A few of these are not in a straight line as you can see in one of the above photos.

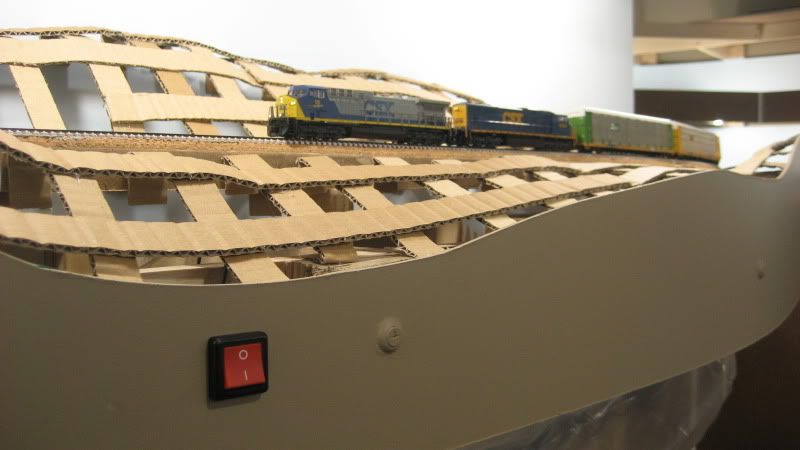
The cutting activity caused a lot of vibration in the layout, as I rattled an autorack right off a staging track a good 8 feet away from where I was cutting. I also found a few sections of track that separated from the caulk holding it to the roadbed. Also, the fine sawdust managed to gunk up the track and fouled a Kato locomotive, even after I thought I had removed all of the dust with a Shop Vac. For future cuts, I will remove the fascia boards after drawing the hill profile in chalk and make the cuts in the workshop.

.