Tuesday, October 28, 2008

Layout Progress as of 10/29/2008

Progress has literally rolled on the last few days as I managed to roll on two full coats of primer to all of the Masonite backdrops. It is amazing how much brighter the room becomes when those panels go from dark brown to bright white! Next up on the agenda is to get all of the basic sky colors painted on the backdrops, then it should be time to move on to the helix and the gate across the room entrance lower level.

Here are a few closeup views of the Emerson, GA area on the lower level with only the layout lights on. With the backdrop now brighter than the benchwork and room walls, you start to get the feel of the "museum effect" produced by this type of construction. Note the plastic sheeting stapled to the underside of the lower level that protects the room carpet from paint drips. Also note the semi-gloss sheen of the primer; the top coat will be flat latex interior paint to eliminate any glare or reflection:


A few more wider shots of the layout showing the primed backdrops:


.

Saturday, October 25, 2008

Choosing the Right Sky Color

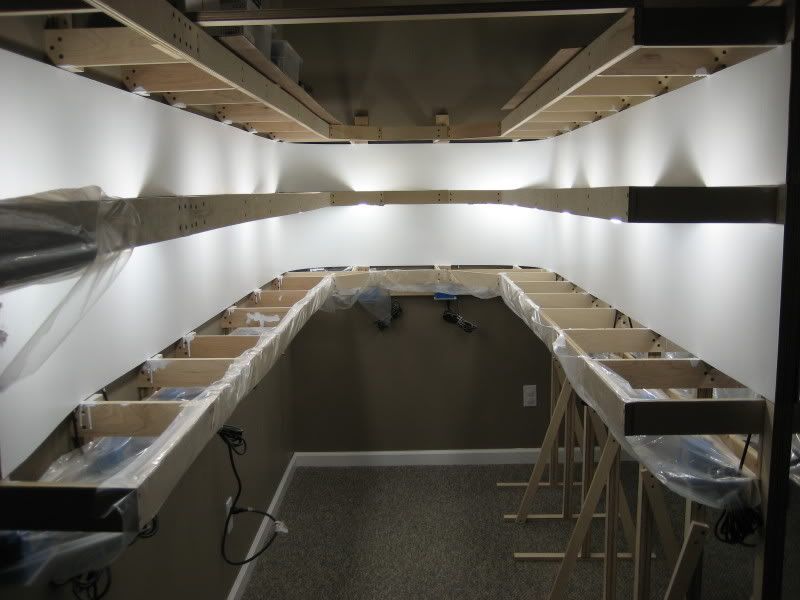
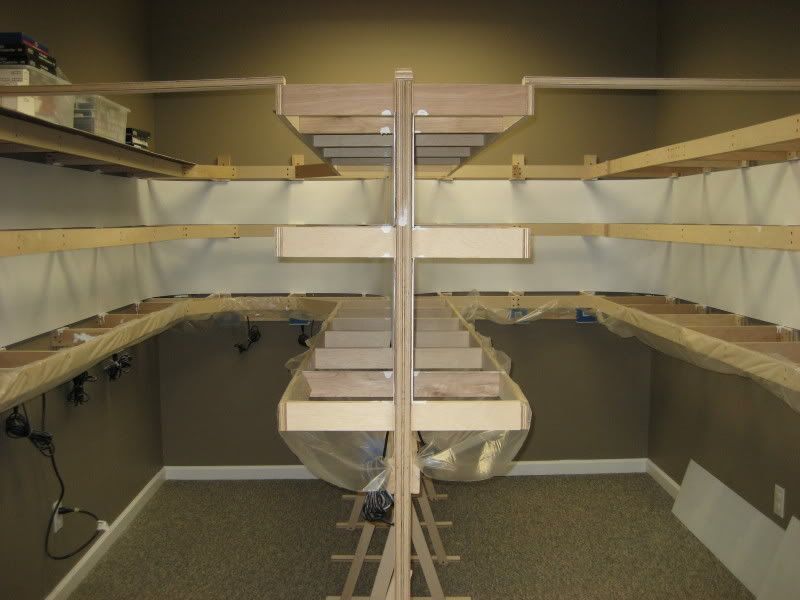
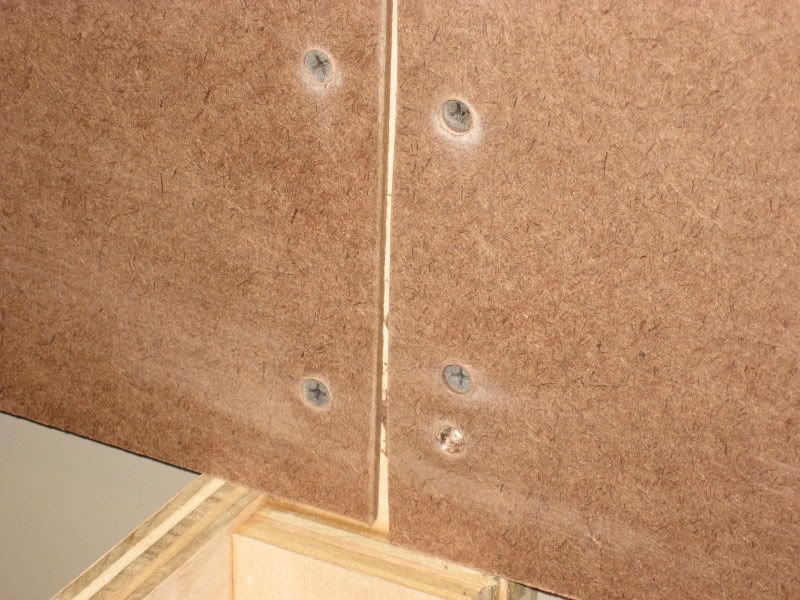
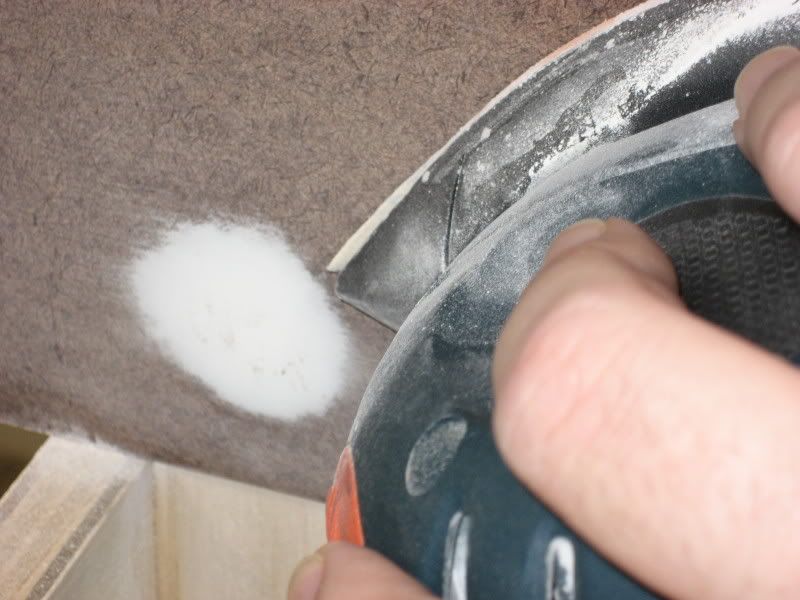
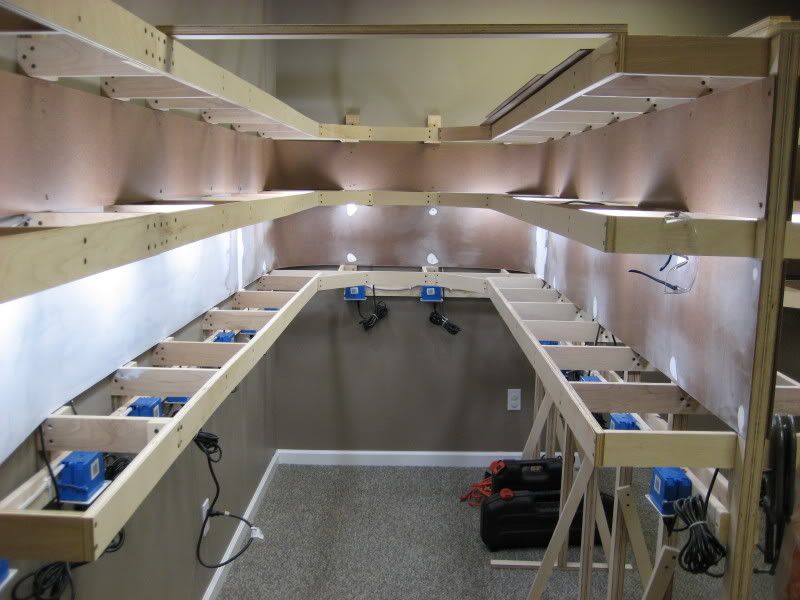
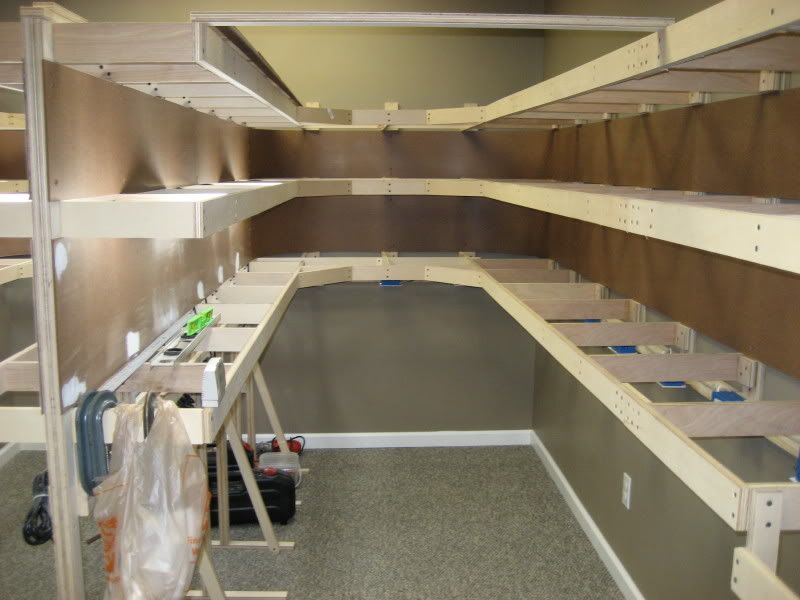
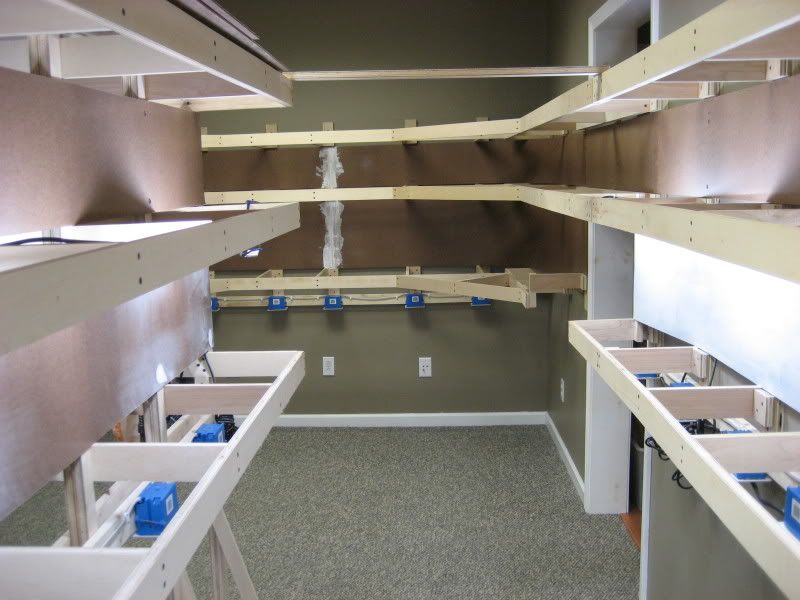
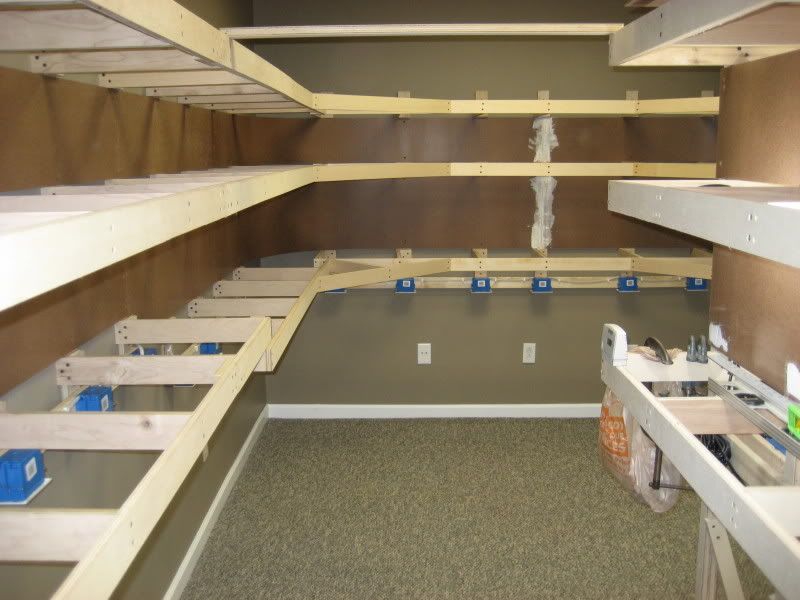
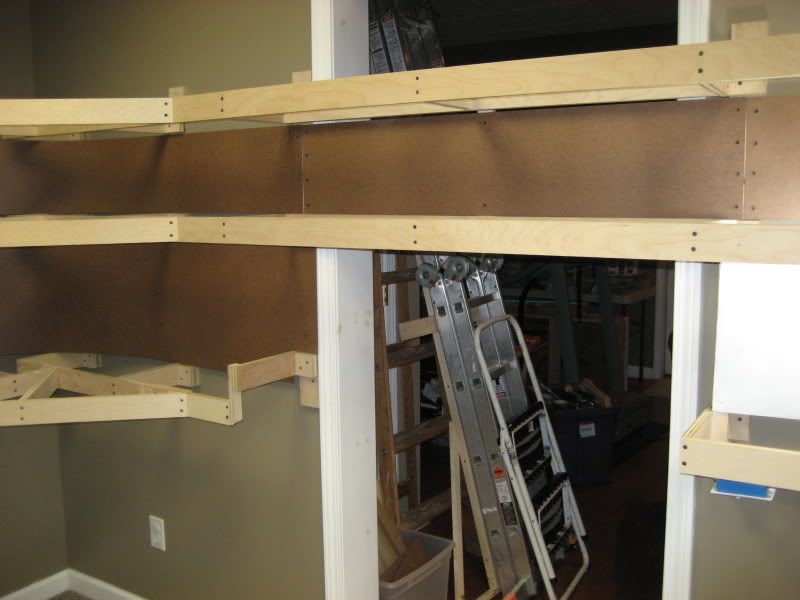
As the construction of my benchwork neared completion, I started to put some serious thought into what would actually go on the 1/8" hardboard panels that make up the backdrop. I originally planned to use photographic backdrops from Backdrop Warehouse. However, I have almost 150 linear feet of backdrop to cover and these photo backdrops run about $20 for a 40" strip, so it did not take long for me to realize this option would be cost prohibitive. Instead, I decided to use the tried-and-true painted sky for my backdrop, with perhaps some generic hillsides added in for scenic interest. But after visiting a few paint departments in the local home improvement stores, a new problem emerged: which color would I choose from the seemingly endless shades of sky blue available?


This photo backdrop from backdrop Warehouse would be ideal on my layout, but the prices are "sky high."

The first step I took in researching this problem was to hit all of the model railroad forums I frequent, such as TrainBoard.com and the Model Railroader forums at Trains.com. By searching existing threads, I was able to find posts--many with numerous photos--describing how other modelers crafted their backdrops. Another reliable source for scenery information is Model-Trains-Video.com, which contains an entire video series available on DVD or dowloadable MPEGs that details the scenery techniques used to create Joe Fugate's HO-scale SP Siskiyou Line layout. After visiting these sites, I settled on a sky painting technique that basically involved applying a sky blue color to the entire backdrop and then airbrushing in some white along the bottom of the backdrop to simulate the lighter sky color at the horizon.

Right after I settled on this technique, I saw an advertisement in Model Railroader for a new book in the Kalmbach Publishing how-to series titled Painting Backdrops for Your Model Railroad. As luck would have it, I found this book in stock upon my next visit to the local hobby shop so I purchased a copy. The book was written by Mike Dannemann, who is currently constructing an N-scale layout depicting the Rio Grande in the Colorado Rockies. His backdrops are spectacular and he shares his techniques in an easy to understand step-by-step format. Even better, each chapter focuses on how to paint a backdrop for a particular region in North America, including the hills and mountains of the eastern United States that will be included on my layout. This is an excellent book and I highly recommend it, both for its highly informational content and its inspirational "eye-candy" format. After reading this book, I made two decisions. First, I now plan on painting specific features such as clouds and detailed tree covered hillsides on my backdrop, something I would not have previously considered. Second, rather than airbrushing white onto the lower backdrop, I will use a lighter shade of blue paint feathered in with a brush to simulate the lighter horizon.


This book is an excellent resource for model railroad backdrops and has dramatically influenced the way my backdrop will be painted.

Although all of this research managed to refine my backdrop strategy, it still did not answer my original question: which shade of blue do I use for the sky? In fact, not only did I not settle on a single color, but I now needed 
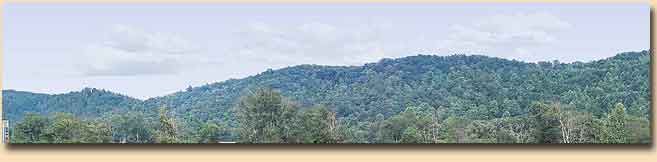
two colors of blue to complete my sky backdrop! To pick these colors, I first collected lots of paint samples from the local paint departments. I then took these outside on a clear sunny afternoon and held them up with the sun at my back. This allowed me to eliminate all but a few shades of blue, and I took these remaining samples to the basement and viewed them under the layout lights. I also brought down prints of several photographs that I have taken while railfanning my prototype railroad, the CSX in north Georgia. This allowed me to settle on a single shade of blue for my primary sky color: Horizon Haze, which is available in the lineup of Behr paints from The Home Depot.

With the primary sky color finally determined, I now had to select a lighter shade of the same blue for the lighter sky along the horizon. This would be a much easier process, since you can pretty much just go to the rack of paint samples at The Home Depot and pick the card that has the lighter shades of colors in the same color group. For example, the shade named Horizon Haze is on the paint card numbered 540B: the 540 is the basic color group and the letter B indicates these are the second lightest shade of colors in the group (A would be the lightest; Z would be the darkest). So I picked up the 540A sample card and looked at the colors. But out of the three colors on sample card 540A, which one would be best to use for the horizon color? I wanted to make sure I picked one that was not too light, but light enough so there would be a noticeable difference between the two shades of blue.

To make this determination, I did a search to see if I could find samples of the Behr paint colors on the web. Sure enough, the Behr website has a nifty little feature called ColorSmart that allows you to explore and play around with all of their colors online. Using this feature, I was able to get swatches of my colors into my Macromedia Fireworks graphics application. Using these colors, I was able to select a color that best complemented the Horizon Haze shade of blue to produce a nice sky. The color I chose as the lighter blue is named Niagra Falls. To make this determination, I made a mock-up of a sample backdrop scene using Fireworks.

Backdrop Mock-up

I started with a photo that I took in north Georgia (where my prototype CSX is located) on a clear sunny day:


Next, I used Fireworks to remove the sky from this photo:


Using Fireworks, I created a plain sky background using my darker shade of blue (Behr 540B-4 Horizon Haze) at the top blended into my lighter shade of blue (Behr 540A-2 Niagra Falls) at the bottom along the horizon:


Finally, I overlaid the foreground scenery from the actual photo over the simulated sky using my selected paint colors and--voila!--I had my perfect sky:


If you look at the original photo and my mock-up side by side, you will notice that my sky colors are a tad lighter than those actually photographed, although they were surprisingly pretty darn close. This is because every commentary on backdrop sky colors I have read recommends choosing a shade or two lighter than what looks ideal, since latex colors will dry darker when they are actually applied to the backdrop. Overall, I am very happy with the selection of these colors and feel confident moving forward that my backdrop will have a realistic appearance, even if I just stick with the basic wild blue yonder.

.

Thursday, October 23, 2008

Layout Progress as of 10/23/2008

The last several days have been busy on the CSX Dixie Line, although most of the work involved a tray full of drywall mud and several finishing knives. Many people do not even consider this type of work when planning a layout, but it is an essential step in the construction process if you plan on having a finished backdrop made of sheet materials such as Masonite hardboard. In fact, my two scenicked levels have about 150 linear feet of backdrop, so the process of covering and sanding all of the joints and screw holes was not a trivial one. However, the process was helped by the fact that my backdrops are only 12.5" high on the lower level and 9.5" high on the middle level. It was still a good bit of work, although this kind of stuff is always fun for me when I think of how the finished product will look. Plus, it can never hurt to brush up on the ol' drywalling skills.

My backdrops are constructed from 1/8" thick sheets of Masonite hardboard. This material comes from the building supply store in standard 8x4' sheets, so unless your backdrop is less than eight feet wide, you will have joints where two sections of the hardboard butt together. These joints need to be filled with drywall compound and sanded to a smooth finish so they will not be visible on the completed backdrop. The screw holes need the same treatment. If done right, the result will be a continuous smooth surface upon which the backdrop can be painted. For a detailed post on how I finished the joints and screws on my backdrop, take a look at this detailed HOW-TO article that I have posted.

Photos

Looking down the left aisle you can see how all of the backdrop joints and screw holes have been filled and sanded prior to applying primer and paint:


The Cartersville/Etowah River area showing two joints on each level. You can see how the edges of the mud covering the joints have been feathered out so that they will not be visible one the backdrop has been primed and painted:


Another view of the finished backdrop joints, this time focusing on the middle level as it crosses the doorway. Notice how the middle level will travel across the doorway uninterrupted while the break in the lower level will feature a swing-out gate to allow access into the layout room:


I finally installed padding along the bottom edge of the middle level benchwork where the nod-under allows access to the layout room. This padding was badly needed, but unfortunately came about 20 head injuries too late. Or maybe it was only 3? The brain damage is hampering my memory:


.

DIY: Finish a Backdrop

This do-it-yourself article describes how I finished the surface of the hardboard backdrop on my CSX Dixie Line layout. It includes all of the steps that I performed after the backdrop was installed and before the backdrop was primed and painted.

Joints

Here is a typical joint on the backdrop where two 1/8" hardboard panels come together. The panels are secured to the wall brackets with five 1 1/4" drywall screws along each side of the joint:


This closeup view of the joint between the two panels clearly shows how the screw heads are countersunk below the surface of the hardboard so the holes can be filled with drywall compound and finished to a smooth surface. The vacant hole at the bottom right is where a screw was protruding above the surface of the hardboard. A new, properly countersunk hole was drilled immediately above the bad one and a new screw was driven. Also note that I have made a pass over the screw holes with a sander because the drilling creates a small ridge that must be removed before the hole can be filled with compound:


Before applying any tape, any gaps and screw holes should be filled in to provide a stronger finished joint. I allow the "prefill" to dry overnight before moving to the next step:


After the "prefill" has dried overnight, I make a pass with the sander to smooth out the joint area. I then apply a piece of fiberglass mesh joint tape to the seam. When covered with drywall compound, this tape will cause the joint to resist cracking as the panels expand and contract throughout the seasons. This particular brand of fiberglass joint tape is extra thin, which I thought would be a good idea since I will also be using paper tape over the fiberglass mesh tape:


Here is a closeup view of the fiberglass mesh tape applied to the joint between the two panels. In this view, you can clearly see where the ridges caused by drilling the pilot holes for the drywall screws were sanded down during a previous step:


To apply the paper tape to the joint, I first applied a thin layer of drywall compound (mud) to the length of the joint with a 6" knife. I then embedded the paper tape in the mud by hand, lightly pressed in into the mud with my fingers, and then made a few passes with the knife to securely embed the tape in the mud. I tried to feather out the edges between the knife and the hardboard as much as possible, although it can be difficult maneuvering the knife around with all of the benchwork framing close by:


After allowing the tape coat of mud to dry overnight, I came back the next day and applied a second coat. There will be a significant "hump" on the surface of the panels from the tape coat--the goal of this second coat is to add more mud along the sides of the tape (where the hump is) and feather it out as wide as possible so the joint will not be noticeable when painted. For this second coat, I moved sided to side with the same 6" knife used during the tape coat. I am not concerned about the ridges that were left behind because they can easily be scraped and sanded down later:


After letting the second coat of mud dry overnight, I came back and scraped down any ridges and blobs of dried mud and made some light passes with the sander to smooth things out. In typical drywall finishing, a third coat would be necessary. However, after sanding the second coat, the joints were smooth enough to be ready for primer and paint. This is probably because the horizontal strokes I used to apply the second coat of mud (necessitated by the benchwork framing) resulted in more mud being applied than if I had used the usual vertical strokes:


Here is the finished joint with the first coat of primer applied. Because of the dark color of the hardboard, a second coat of primer will be required for complete coverage. However, you can clearly see how the joint appears completely smooth, with no evidence of the joint, screw holes or tape visible:


Screws

This closeup view shows a screw head that has not properly been countersunk below the surface of the hardboard backdrop panel. Since we want the backdrop to appear as a continuous, smooth surface, this screw will need to be redone:


To fix the screw, a new properly countersunk hole is drilled immediately above the old location, and a new screw is inserted in the hole. You can see how this screw head sits well below the surface of the hardboard panel when the hole has been drilled correctly. Both holes can now be easily filled and sanded so they will be invisible on the finished backdrop:


The screw hole is filled with drywall mud. After drying overnight, the surface is sanded (I used a Black & Decker "mouse" sander) so the edges of the mud are feathered nicely into the surrounding area:


.

Sunday, October 12, 2008

Layout Progress as of 10/12/2008

Progress on the layout has been limited the last few weeks since the air conditioner in the basement decided to stop working. Although the outside temperatures in north Georgia have only been in the mid- to upper-70s, the humidity has been high (even in the middle of a drought--go figure!) Because of this, I have had to run the dehumidifier constantly, which works great to dry things out but also raises the temperature about 8-10 degrees. Needless to say, 80 degrees and muggy are not great working conditions.

Today I did manage to get down there and make some pretty good progress. I cut and installed all of the backdrops for the middle level. I also went ahead and redid a bunch of the screws holding up the backdrops on the lower level that were not countersunk deep enough. I originally thought that having the screw heads flush with the Masonite would suffice, but after finishing a few screw holes with joint compound, I realized that the screw heads had to be sunk just as if I was installing drywall. I'll do a special post in the next few weeks detailing how I am finishing the seams between the sections of Masonite.

Here are a handful of pictures showing the new middle level backdrops:


.