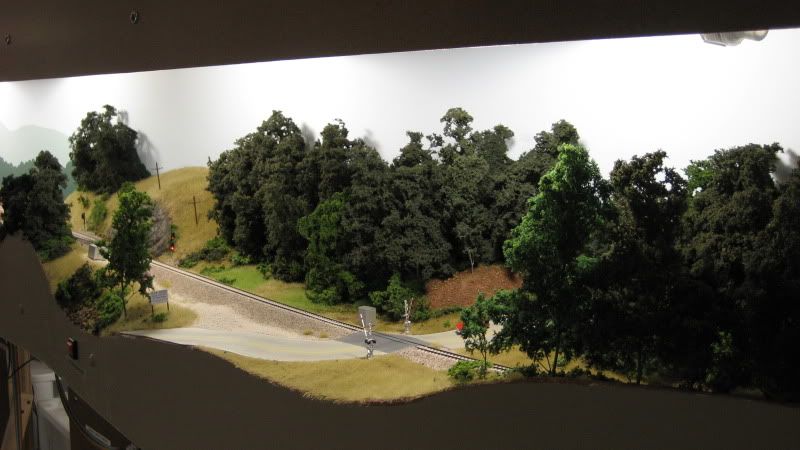
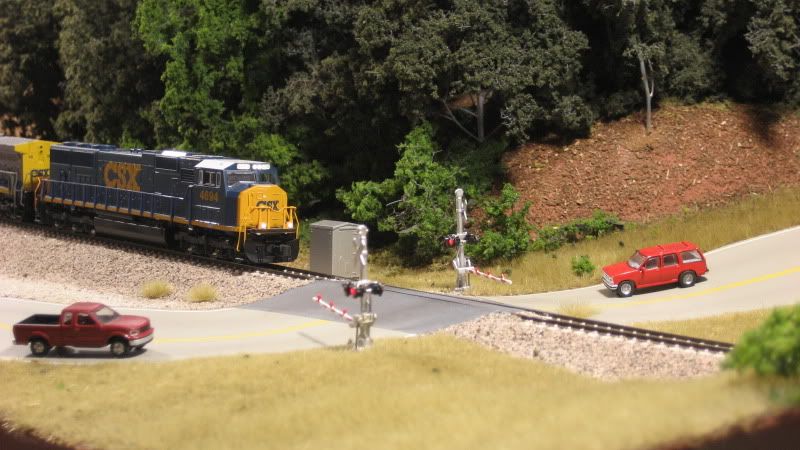
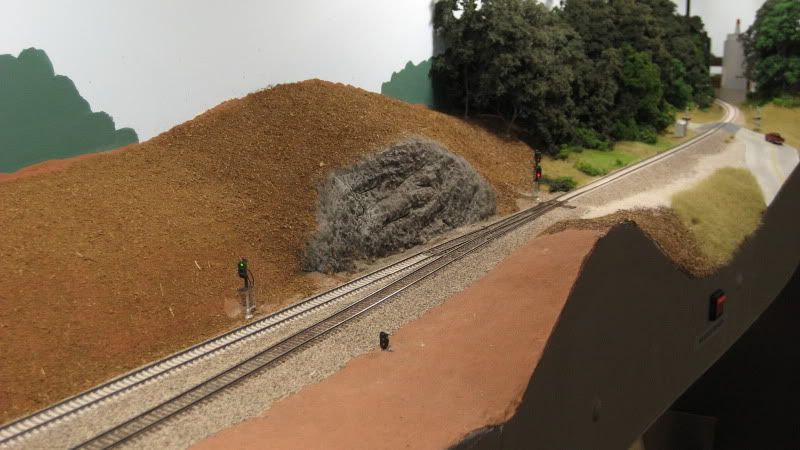
At the south switch of the Emerson passing siding, the CSX mainline follows the side of a hill that includes a small rock cut that was carved many years ago in order to make room for the roadbed. Staying true to the prototype, I decided to model this rock cut. When I was shaping the basic terrain in this area, I allowed a bit of extra clearance to allow room for the rock cut. I initially planned on using plaster rocks cast in rubber molds, but could not find anything that was an appropriate fit. I then turned to
one of Joe Fugate's scenery DVDs which includes a
chapter on hand carving rocks. This video series has proved invaluable to me as I have created the layout, and the chapter on hand carved rocks was no different. I have never before done any kind of hand carved plaster work, but armed with the knowledge gleamed from the DVD, I decided to give it a try. The steps below show how I created my very first hand carved rock.
» Steps
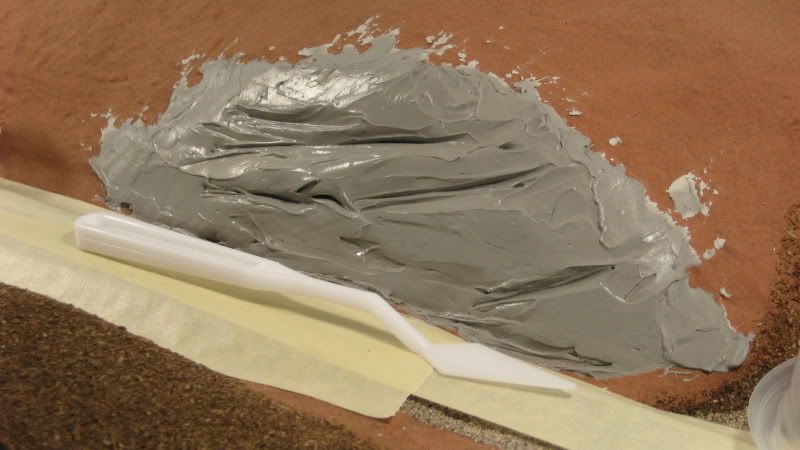
Step 1 To get started, I scooped three globs of DAP pre-mixed patching plaster into a plastic cup and added a few shakes (about half a teaspoon) of black tempera powder paint to kill the bright white color. I then used a putty knife to smear a layer of the plaster mix onto the bare rock face. I first sprayed the surface with water so the old plaster would not rob the new plaster of its moisture. I also used a plastic painter's knife (shown) to carve some grooves into the wet plaster that simulate the layers of sedimentary rock:
 Step 2
 I used a metal painters tool (shown) to pick at the plaster as it setup, creating nicks, grooves and other random gouges in the rock face. If you begin carving before the plaster has setup enough, it will crumble rather than flake. If you get crumbling, stop and come back later to resume your carving.
IMPORTANT: Patching plaster contains retarder to extend its working time. For my batch of plaster, it took 8-10 hours before the plaster setup to the point where it could be carved! It was then about another four hours before the center section had setup to the point where I could finish carving. In this photo, taken 12 hours after the plaster was applied to the layout, you can see an area that is still too soft to be carved (the smooth area at the lower left-center side of the rock):
 Step 3
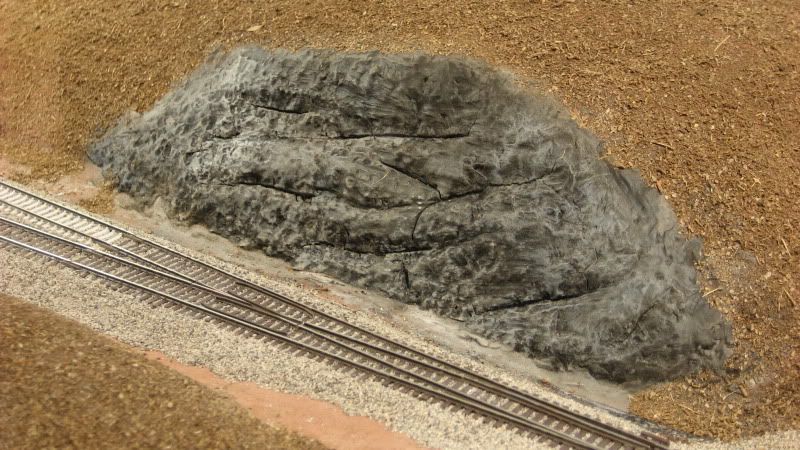
 Finally, after about 16 hours, the carving is complete. Before the plaster is completely dry, lightly scrub it with a stiff plastic-bristle brush (shown in the previous photo) to give the rock a realistic weathered look. As I scrub, I use a soft paintbrush to clean any small particles off of the rock face so I can see how things are progressing:
 Step 4
 I begin staining the rock face by using a medium gray acrylic paint thinned to a wash. You will find that the plaster really soaks up the paint, so be sure to give it a few sprays of water every now and then to keep the paint flowing:

 Step 5
 After the initial gray wash has dried, apply a second dark black-brown wash. In the second photo, notice how this second wash settles into the grooves and cracks--for the first time, this rock is starting to look like the real thing:

 Step 6
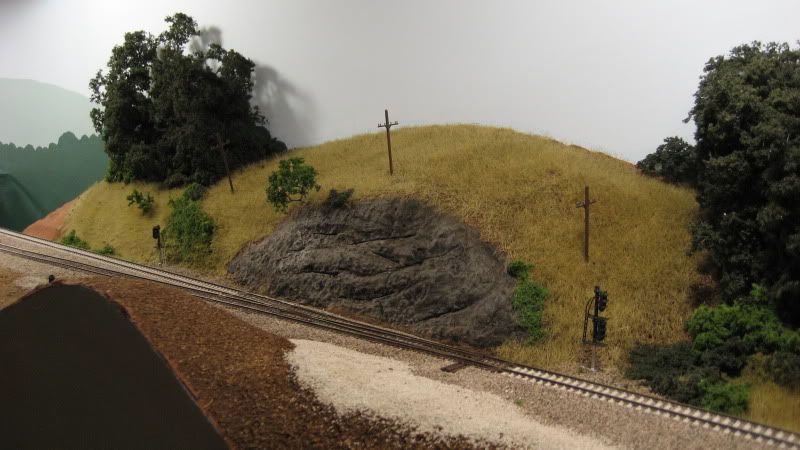
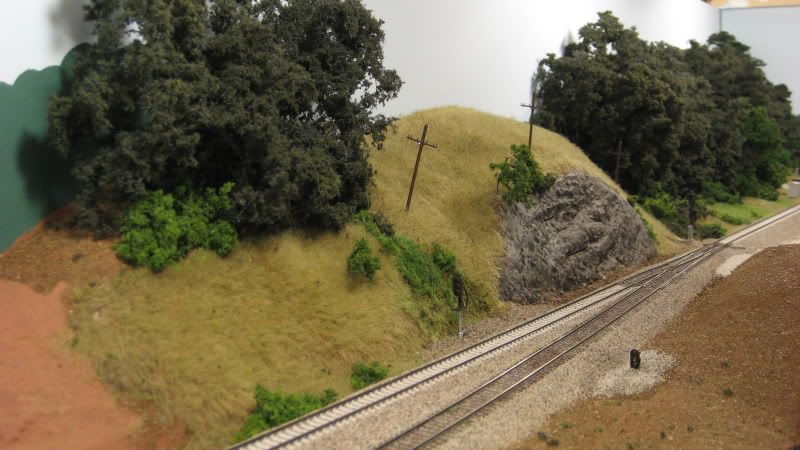
 At this point, I began to blend the rock in with the surrounding scenery by applying my homemade dirt to the painted, textured scenery base. I also dry brushed on some varying shades of grays and browns to introduce some variations into the rock coloring:
 Step 7
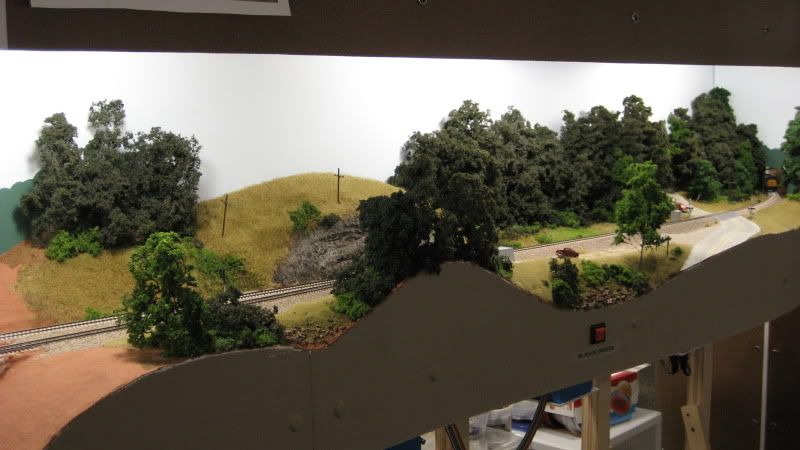
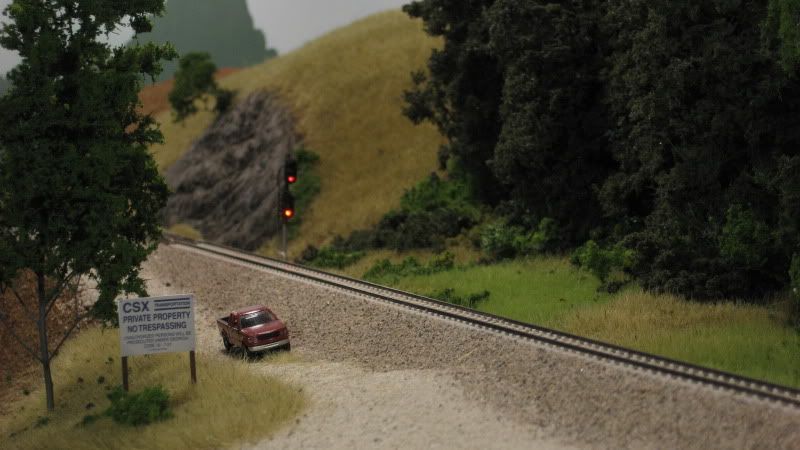
 All done! Well, almost done, since there will be some additional weathering done with pastels as the surrounding scenery is added. Here is a close-up view of the (almost) finished rock and a few wider shots showing how the rock cut fits into the overall scene:

.