Sunday, January 31, 2010

Layout Progress as of 1/31/2010

I have now completed week six of eight weeks of the Second Annual International Winter Layout Party on TrainBoard. Progress continues on the Emerson, GA scene of the layout as shown in the series of photos below. This week I finished painting the distant hills and foreground trees on the backdrop. With this done, I can move on to the actual hard shell terrain using plaster cloth and Sculptamold.

» Photos


Here is a look at the completed backdrop at South Emerson:


Completed backdrop at North Emerson. The backdrop behind the flat town area in the middle distance has been left blank because I am not sure at this point how the actual town scenery (structures, roads, etc.) will be laid out:


A local freight led by a Conrail GP15-1 is holding the siding as a northbound vehicle train passes on the mainline. I-75 passes below both tracks in this scene:


.

Sunday, January 24, 2010

Layout Progress as of 1/24/2010

I have now completed week five of eight weeks of the Second Annual International Winter Layout Party on TrainBoard. Progress continues on the Emerson, GA scene of the layout as shown in the series of photos below.

» Photos


Before continuing with the scenery around Emerson, I finished installing the house track. I had previously built the house track roadbed as described in an earlier post. The house track is laid directly on top of the spline roadbed, so before laying the track, I first had to build a transition ramp down from the turnout off of the siding, which is laid on a single layer of cork roadbed. I built the ramp by installing a short section of cork roadbed and sanding a smooth transition from the turnout down to the house track roadbed:


Next, I installed the house track using a short section of Micro Engineering code 55 weathered rail flex track and acrylic latex caulk:


As with every other piece of track installed on the layout, the Emerson house track had a pair of feeder wires soldered to the rails at the workbench prior to installation. After the caulk had dried and I wired the feeders into the DCC bus lines, a pair of CSX engines decided to try out the latest rails to come online in the CSX Dixie Line system:


While waiting for the caulk to dry on the house track, I started work on painting the distant hills onto the backdrop. In the following three photos, you can see where I have pencilled in the hill profiles using actual prototype photos as a guide:


I used a Mr. Clean Magic Eraser to redo the pencil line hill profiles several times. When I was satisfied with the distant hill shapes and proportions, I painted them using a light blue-green color that I obtained by mixing a small amount of my dark green foliage color into my light blue color used to paint the sky on the backdrop. I experimented with the hill color on a scrap piece of hardboard, taking sample photos with my digital camera to determine when I had the green-to-blue ratio just right. I then had a gallon mixed at the local home improvement center. The following three photos show the results of painting the distant hills:


I am not happy at all with the distant hill profile in the last photo above because I feel the middle hill looks way too "lumpy." This should be a simple fix using a bit more of the light blue-green color to smooth out the profile during an upcoming work session. Once that is done, I will paint the foreground tree line onto the backdrop below the distant hills.

Finally, I completed the cardboard web and masking tape layers of the scenery base in the town of Emerson. The gaps between the tracks will need to be filled with narrow strips of foam or some other suitable material:


.

Sunday, January 17, 2010

Layout Progress as of 1/17/2010

I have now completed week four of eight weeks of the Second Annual International Winter Layout Party on TrainBoard. Progress continues on the Emerson, GA scene of the layout as shown in the series of photos below.

I had originally planned on using 2" thick extruded foam board in the town of Emerson, including the roadbed for the Emerson house track. However, after some foam board experiments did not yield satisfactory results, I decided to stick with my spline roadbed/cardboard web combination. This meant that before I could continue the cardboard web in town, I had to (finally) build the roadbed for the Emerson house track. Up until now, the diverging route of the turnout from the siding to the house track was just floating in space like a track to nowhere.

When I went to start work on the roadbed for the house track, I noticed about a foot of the passing siding track had popped loose from the roadbed and was just floating about 1/4" in the air. For most of 2009, the Atlanta area was innundated with record shattering rainfall. However, for the last several weeks, we have been having bitterly cold and extremely dry weather. This has caused the benchwork to dry out and the resulting "shrinkage" has caused a lot of track pops. Usually just a few drops of super glue will tack the track back down nicely, but this particular section of the passing siding near the house track was extreme and required some special attention.

» Photos


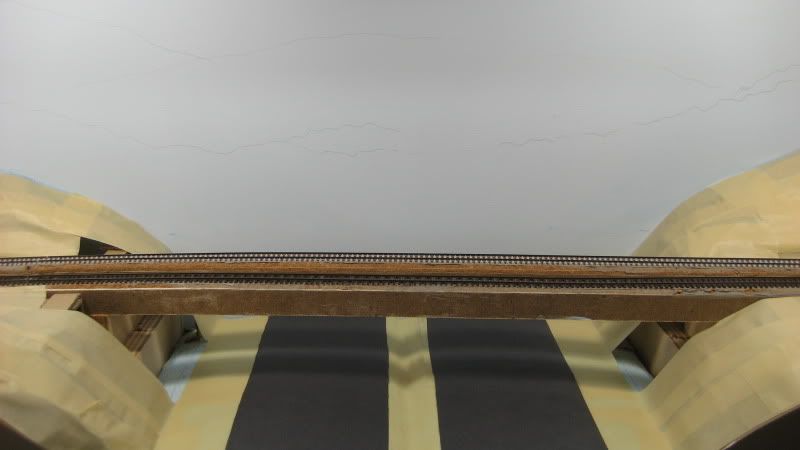
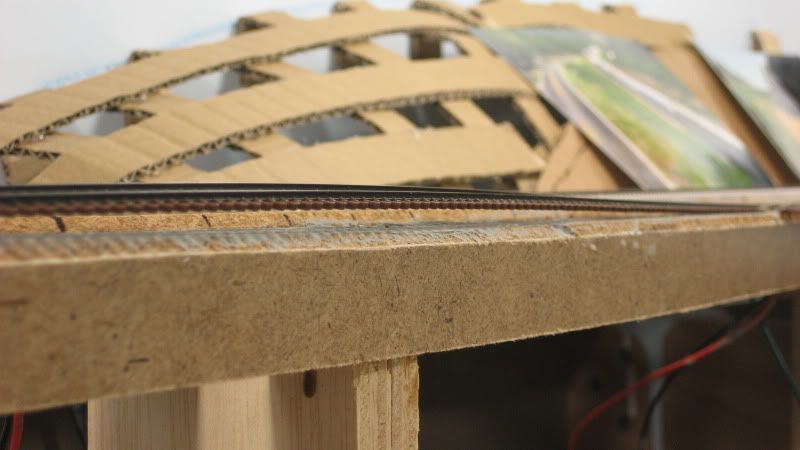
Here is a profile photo of the siding track that has popped up in Emerson. The cutting mat in the background shows the scale of the deformation:


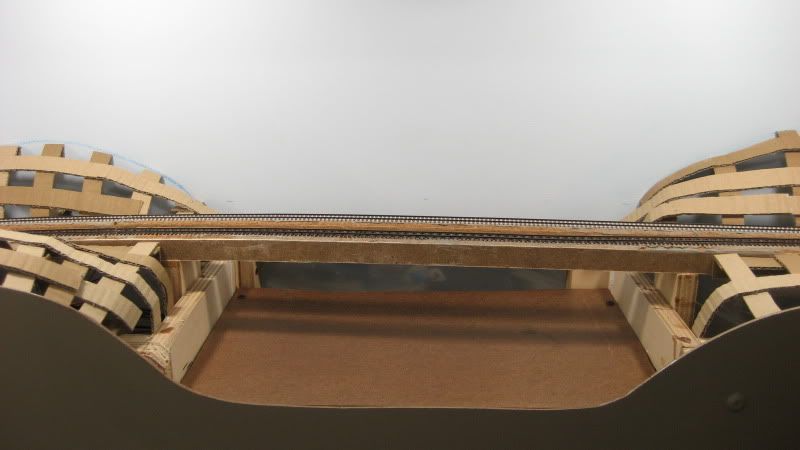
Here is a wider angle shot of the same track with the cutting mat removed:


Fortunately, this section of flex track terminates at a turnout and I do not solder any rail joiners on my turnouts. This allowed me to slip the rail joiners back, lift up the flex track, and nip a bit off the ends of the rails. This allowed the track to conform to its original alignment. I then placed the track back down and slid the rail joiners back into place. I have left gaps between the ends of the rails here to allow for more expansion in the future:


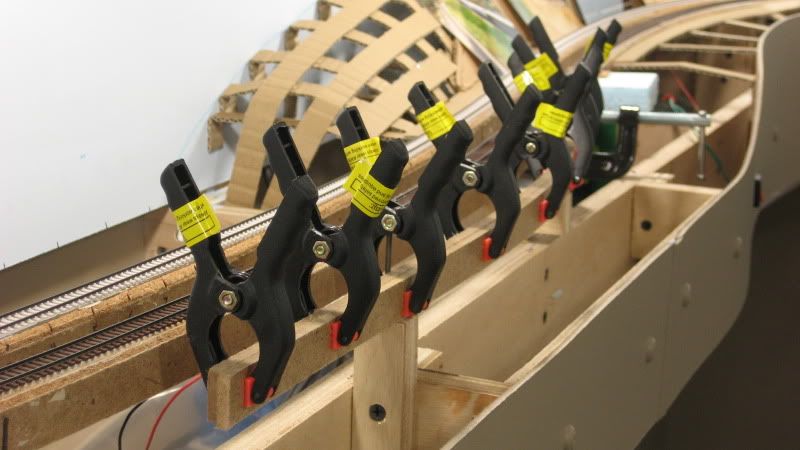
After shortening the track and joining it back to the house track turnout, the track gang laid a bead of super glue and placed some clamps to get the track attached back to the roadbed:


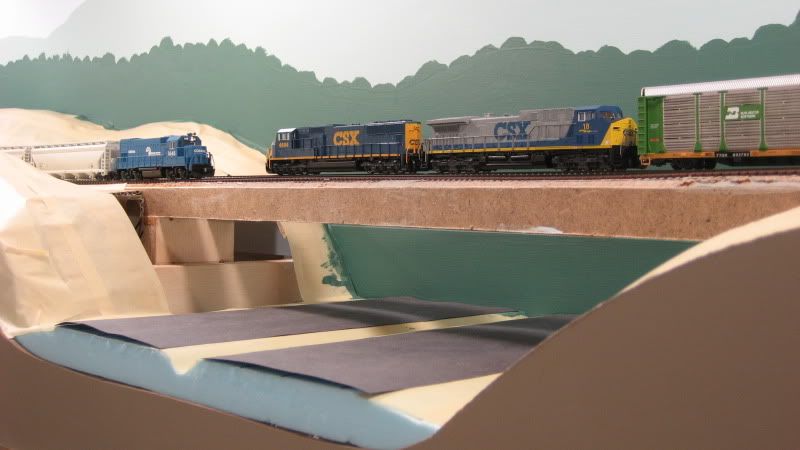
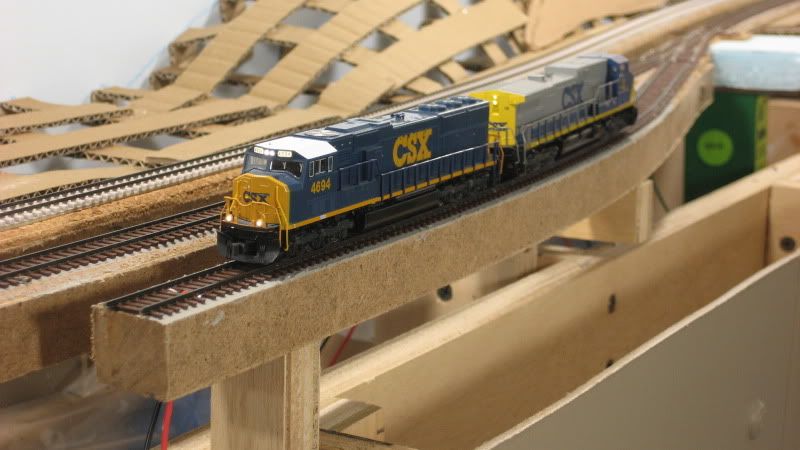
A test train crawls across the newly repaired trackwork:


To prevent track pops from happening, I gap every section of flex track. However, in this closeup photo, you can see that the extreme benchwork shrinkage has completely closed the gaps in both rails (just to the left of the feeder wires), causing the track pop that was repaired above:


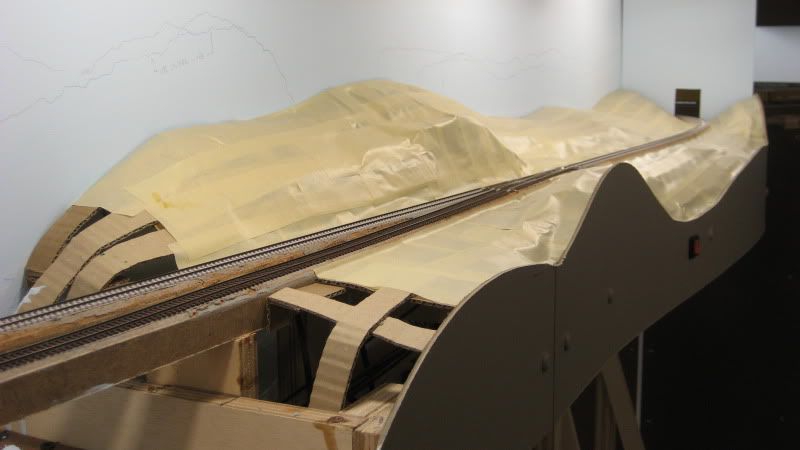
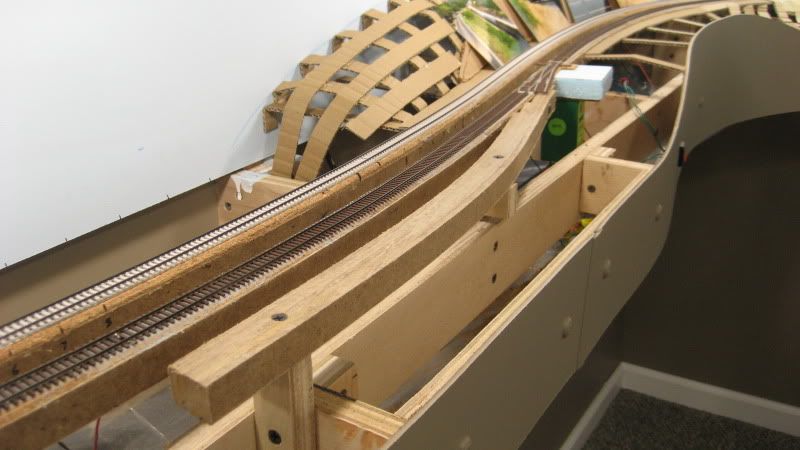
With the popped trackwork repaired, I moved on to building the roadbed for the Emerson house track. Here are the first few splines clamped in place:


Spline roadbed goes together quickly. A few hours after starting, the spline roadbed for the Emerson house track has been completed:


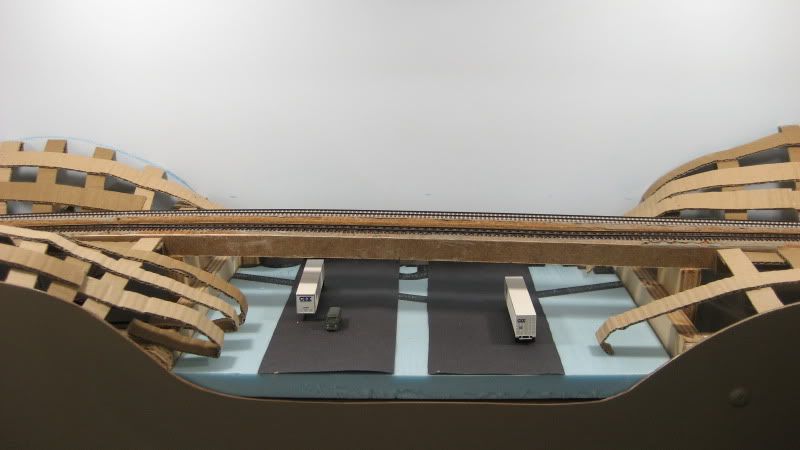
The Emerson house track is used for setting out defective cars and has a capacity for three 50-foot cars:


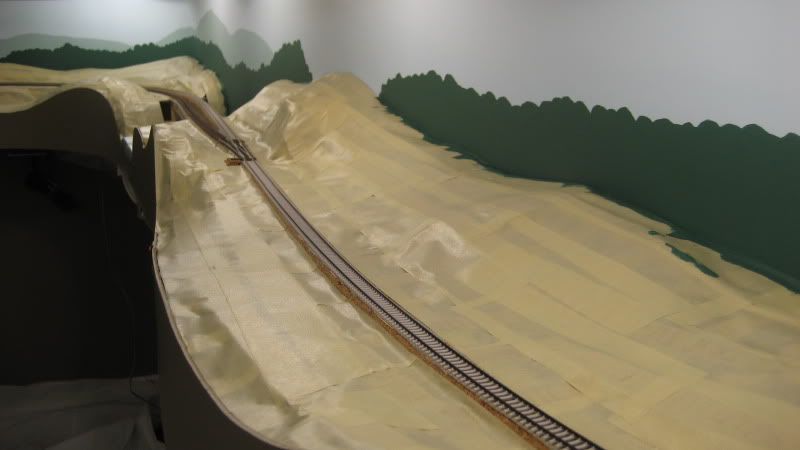
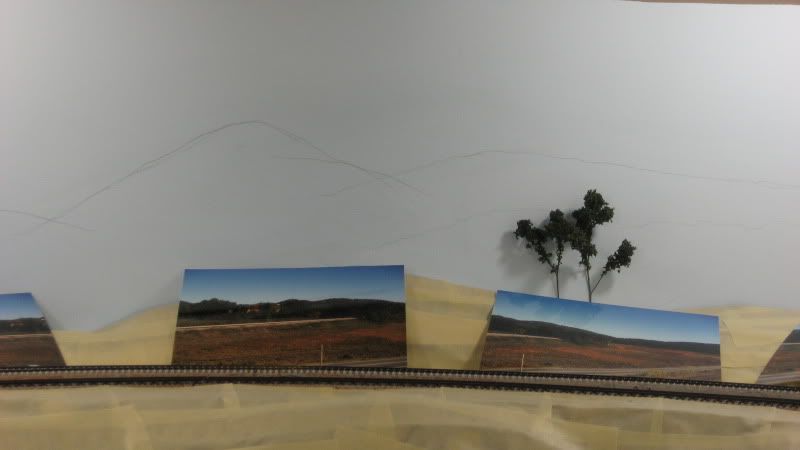
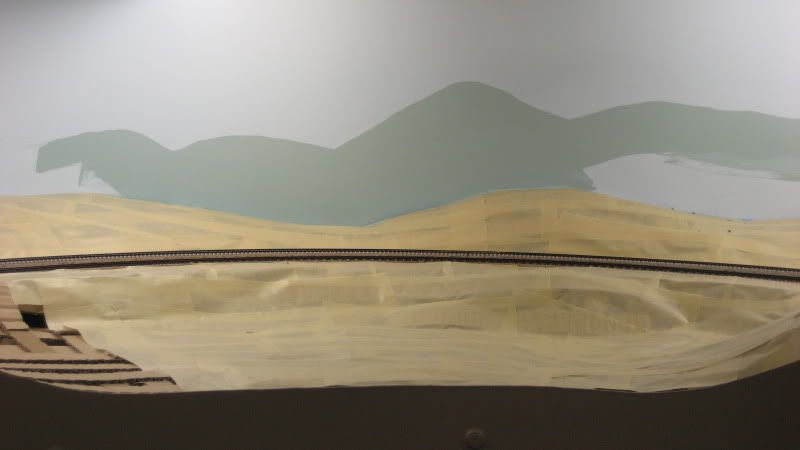
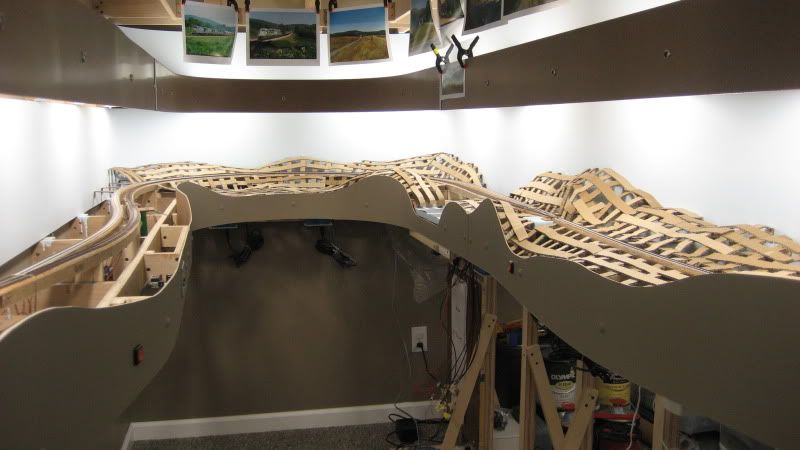
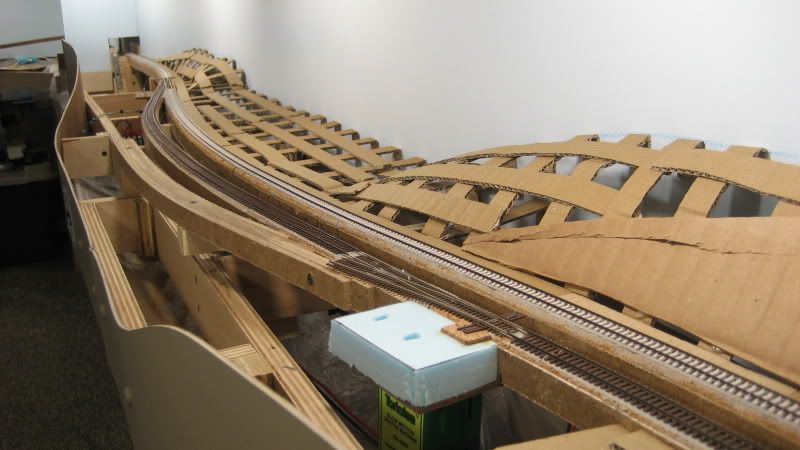
Finally, I completed the cardboard web between the tracks and the backdrop all the way to the north end of the Emerson scene. The flat area in the middle distance is to accomodate a residential neighborhood that borders the railroad:


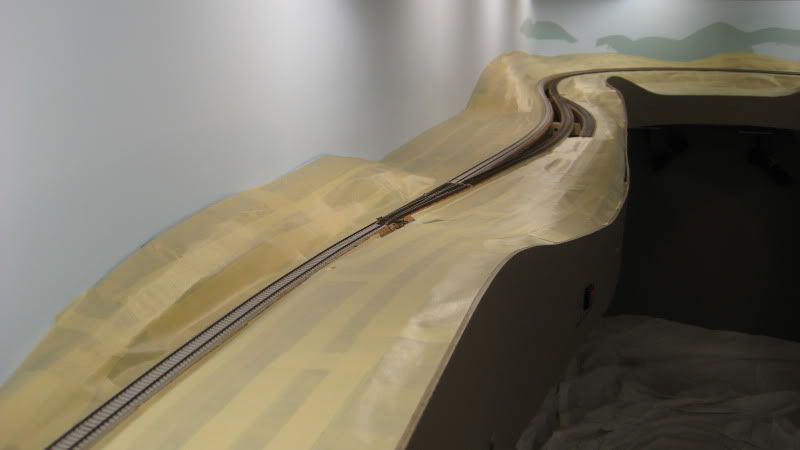
Here is the same area looking north:


.

Sunday, January 10, 2010

Layout Progress as of 1/10/2010

I have now completed week three of eight weeks of the Second Annual International Winter Layout Party on TrainBoard. Progress continues on the Emerson, GA scene of the layout as shown in the series of photos below.

» Photos


Starting at the southernmost end of the mainline, I applied strips of 2" wide masking tape to the cardboard web. I learned this method from watching Joe Fugate's excellent DVD series on layout scenery construction at Model-Trains-Video.com. Although this is an optional step, it allows you to get a very good idea of what the final terrain profiles will look like before the actual plaster layer is applied. If something doesn't look right, it is pretty simple to redo a section of cardboard web and masking tape.

This photo looks southbound towards the south end of the Emerson passing siding with the southern end of the visible mainline in the distance. You can also see where I have begun to pencil in the treeline and distant hills on the backdrop:


Same scene looking in the opposite direction:


I trimmed some cork to use as shims under the headblock ties of the turnout at South Emerson. I made sure the cork did not interfere with the actuator wire coming up from the Tortoise turnout motor before I used a few carefully placed drops of wood glue to secure the cork:


Farther north along the mainline is the turnback curve at the end of the aisle. I have completed most of the masking tape in this area as well. I have also setup some prototype photos of the area so I can get the correct treeline and distant hills pencilled onto the backdrop:


Here is a current view of the town of Emerson and the north end of the Emerson passing siding. In the distance, I have started roughing in the terrain for the U.S. 41 overpass, but there is still a lot of work to do in this area:


Before I could finish roughing in the terrain around the I-75 underpass, I had to cover the gap below the backdrop. To do this, I used a 2.5" wide strip of plastic that I cutout from a 19" x 15" "For Sale by Owner" sign purchased from ACE Hardware for a cool $3. I secured the plastic strip using Pliobond, a contact cement-like adhesive that stays flexible:


After the adhesive cured, I applied a coat of the same sky blue paint used on the backdrop:


In the previous photo, you can clearly see the seam between the backdrop and the plastic strip. However, this seam will not be visible in typical viewing angles:


The highway in the I-75 underpass scene will be supported on a 3/4" layer of blue extruded foam. Here is a mockup of the completed scene:


Finally, I carved the shoulders and median into the foam and affixed it to the benchwork using latex caulk. I then attached the cardboard web to the foam and covered it with strips of masking tape to finish the rough-in. The openings around the ends of the bridge are to allow the abutments to be placed when the time comes. Two strips of black construction paper are standing in for the highway:


.

Monday, January 4, 2010

Layout Progress as of 1/3/2010

Happy New Year!

As we start a new year and a new decade, I have completed the second week (out of eight total weeks) of the Second Annual International Winter Layout Party on TrainBoard. Progress continues on the Emerson, GA scene of the layout as shown in the series of photos below.

» Photos


The mainline and the siding cross I-75 just south of the town of Emerson. Some additional framing had to be completed to support the bridge, highway and any surrounding scenery. I used some scraps of 1" x 3" boards and a small section of 1/8" hardboard to do the trick:


The following photo shows how a small piece of 3/4" blue foam board will be used to support the highway. Using the foam will allow me to easily carve features such as the road profile and drainage ditches into the terrain. The actual highway surface will probably be constructed using sheet styrene cut to size. I have mocked up the scene using construction paper for the highway and added a few vehicles to verify the bridge clearance is appropriate. Notice how the cardboard web will be extended right down to the shoulders of the highway:


The cardboard web has been extended around the turnback curve at the end of the aisle. The elevated track roadbed and the cardboard web make it easy to build terrain that drops well below track level as you can see in this photo:


Here is an overall view of the entire Emerson scene showing all work completed so far. I have used the framing of the upper deck to support a gallery of prototype photos that will help guide me in reproducing this scene as faithfully as possible:


Finally, this last photo shows a simple Digitrax UP5 panel that I installed and wired this past week:


While this is an an insignificant detail on the surface, it has great meaning to me because I have seen these in use on so many layouts over the years and I can't believe I finally have one of my own. It was a very good feeling the first time I plugged in a throttle and ran a train.

.