This article shows how I install one of the light fixtures on the lower level of the N-scale CSX Dixie Line layout. There are 31 of these fixtures on the lower level; the same number will eventually be installed on the upper level as well. At about $6 per fixture (including a compact fluorescent bulb), the cost of the lighting is about $180 per level.
I have included highly detailed step-by-step instructions with lots of photos. Although many of these steps may seem quite obvious, I have included them with the hope that they may be helpful to future modelers.
Step-by-Step in PicturesStep 1 The following picture shows the materials used to install one light fixture including (clockwise from top):
-- Hemma cord set (Ikea)
-- nVision 60-watt Daylight CFL Bulb (Home Depot)
-- 3/4" #14 screw (Home Depot)
-- 1 1/4" Conduit Hanger (Home Depot)
-- small strip of craft foam
 Step 2
 Begin by marking the location of the light fixtures. For the geometry of my layout, I found that a 2' distance between lights worked great. I mount the fixtures inside the 1x3" front boards of the layout bench work. The first thing to do is to drill a 7/64" pilot hole for the #14 screw that will hold the fixture to the front board:
 Step 3
 Next, use a 3/4" #14 screw to attach the 1 1/4" metal conduit hanger to the front board. Note that the square hole on the hanger should be towards the top, so that the bolt used to grip the socket is pointing down. This may seem like a minor point, but after the upper deck is installed, access to the nut on top of the conduit hangar may be difficult in the event the fixture needs to be replaced. As this picture shows, I installed the conduit hanger "upside down" (you can see the square hole on the bottom; I had to go back later and swivel the hanger 180 degrees before installing the socket):
 Step 4
 I cut a small strip of craft foam and place it inside the conduit hanger before installing the socket. The foam acts as a "gripper" between the hard surfaces of the hanger and socket and insures the socket will not move around after final installation:
 Step 5
 Before installing the socket, the 15' cord must be run behind the backdrop...
 Step 6
 ...and behind the power strip along the bottom of the layout (the clear plastic sheeting stapled to the bottom of the layout protects the carpet from drips when the backdrop is painted):
 Step 7
 Insert the socket into the conduit hanger and tighten the bolt. I only finger tighten the bolt a few threads so that I do not damage the socket. You may need to pry open the hanger a bit to fit the socket inside the hanger and the strip of craft foam. You can also see that I have correctly rotated the hanger so that the nut for the bolt is at the bottom of the fixture for easy access:
 Step 8
 I use a plastic cable tie to secure the cord to one of the bench work members. This will prevent the cord from hanging down into the visible scenery. I attach the cable tie using a staple gun...
 Step 9
 ...then trim away the excess with a pair of wire cutters:
 Step 10
 The CFL bulb is then screwed in to the socket:
 Step 11
 The excess cable (there will be a lot of excess since the Hemma socket comes with 15' of cord) is then bundled up and secured with the wire tie that came with the socket:
 Step 12
 Now simply plug in the cord...
 Step 13
 ...and let there be light!
 Step 14
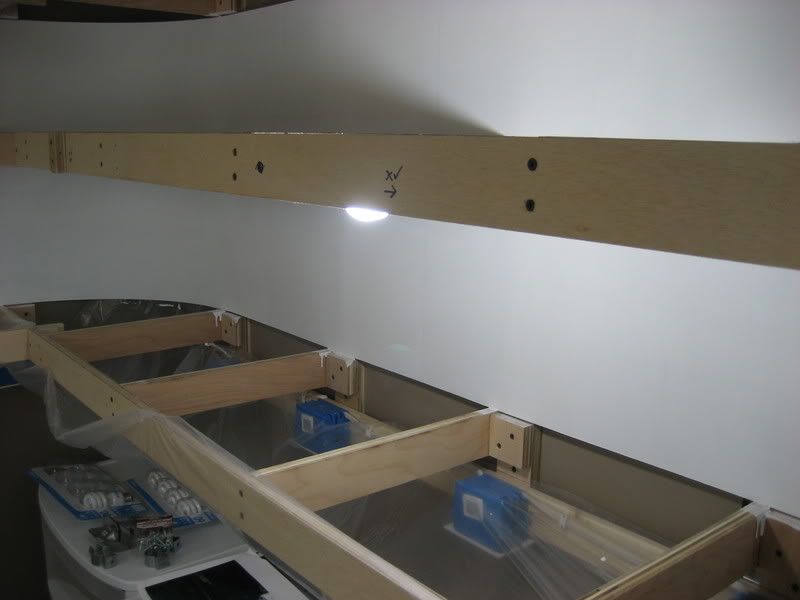
 The entire fixture is rotated downward so the light bulb "peeks" out below the bench work. This allows light to reach the upper areas of the backdrop more evenly:

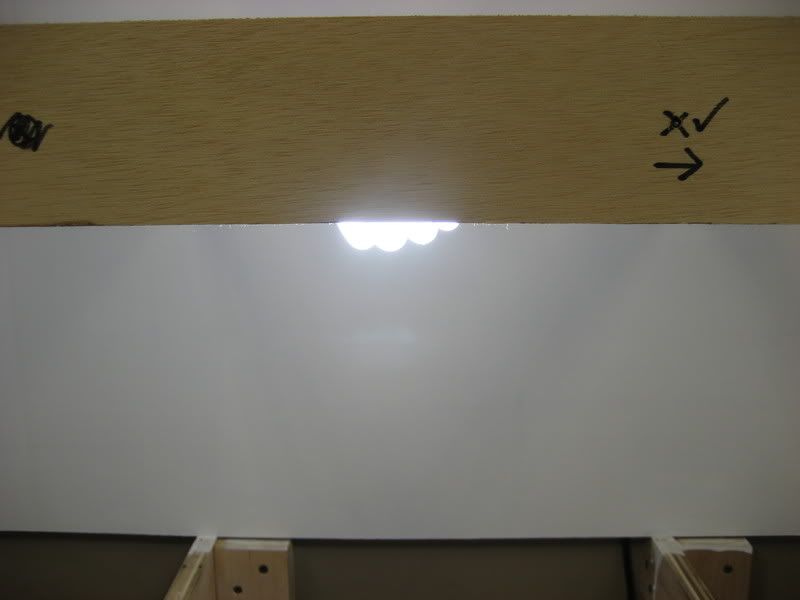
Here you can see the bulb when viewed from the front of the layout. The bulb will be hidden from view when the fascia boards are eventually installed:
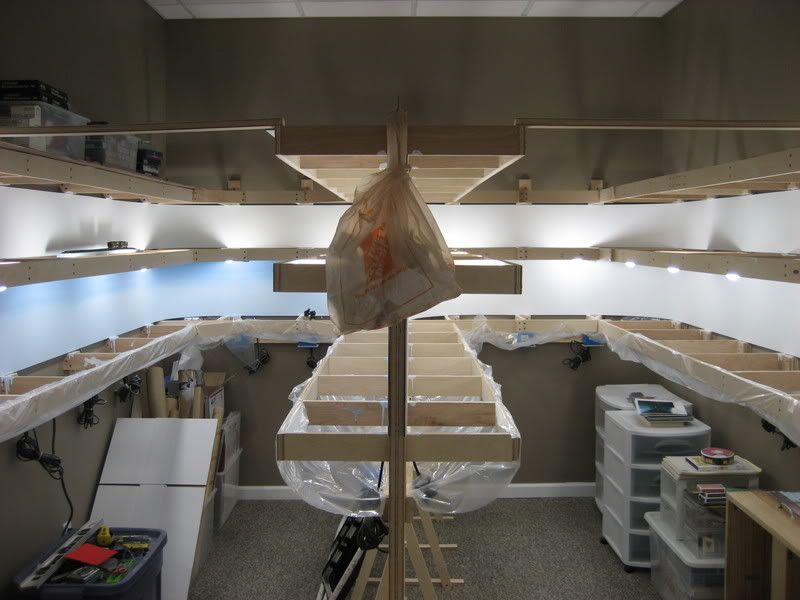
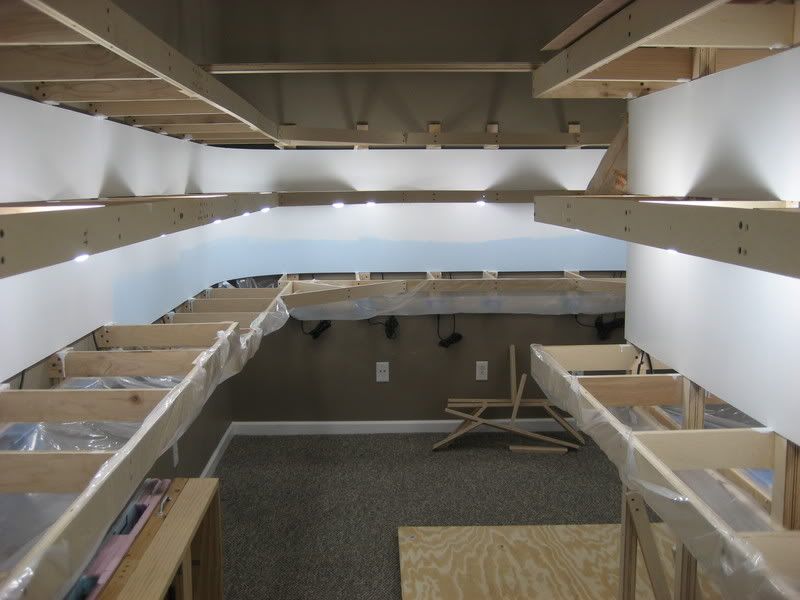
Here is a wider view of the entire area lit by the fixture we just installed. This area will be brightened considerably when the adjacent fixtures are installed:
.