Over the weekend following Christmas, I managed to get all of the remaining backdrops painted in the light sky blue color. In a previous post, I described how I completed painting one section of backdrop using two shades of blue blended together to simulate the lighter sky found at the horizon. However, I was not completely satisfied with the results of this effort, and after seeing how good the solid light blue sky looks, I have pretty much decided to paint over the previously finished section with the single shade of light blue. I was not terribly dissatisfied with my earlier effort, but the solid light blue just looks much better to me.
If I do decide to forgo the darker shade of blue, I will try one final experiment to simulate the horizon: spraying the lower half of the backdrop white and feathering it into the light blue at the top. Hopefully my airbrush skills will be better than my brush painting skills!
I did not take any photos of the completed backdrops using the solid light sky blue, although you can see the results in some of the photos included in the post describing the helix base. However, I did grab a shot of this Red Caboose Burlington Northern autorack that I found under the Christmas tree with my name on it. Thank you Shelley, Hannah and Ryan!
After a long layoff due to several end-of-year project deadlines at work, layout construction has (finally!) resumed on the N-scale CSX Dixie Line layout. After we opened presents on Christmas morning, I headed into the train room where I managed to get the final six lighting fixtures installed on the lower level. There ended up being 31 fixtures--the same number will be required when the upper level is eventually built out. I have also posted a HOWTO article describing how I installed each of the lighting fixtures.
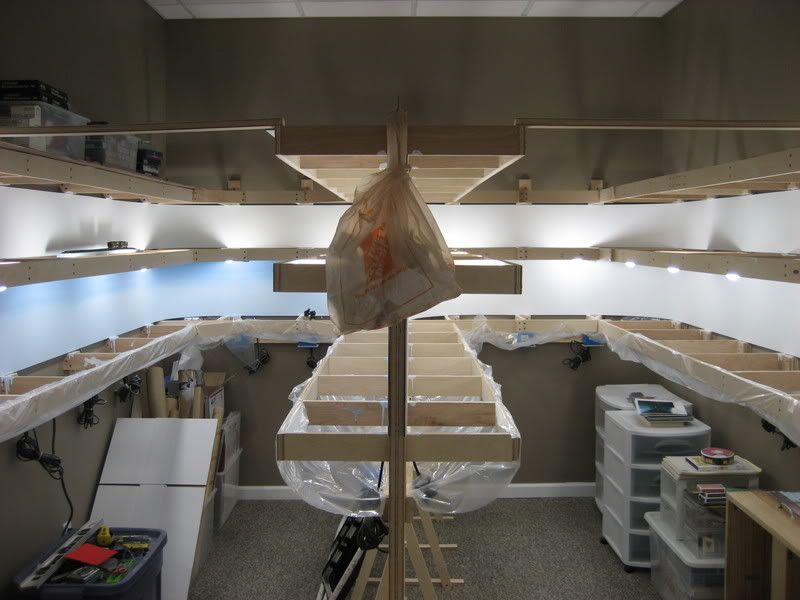
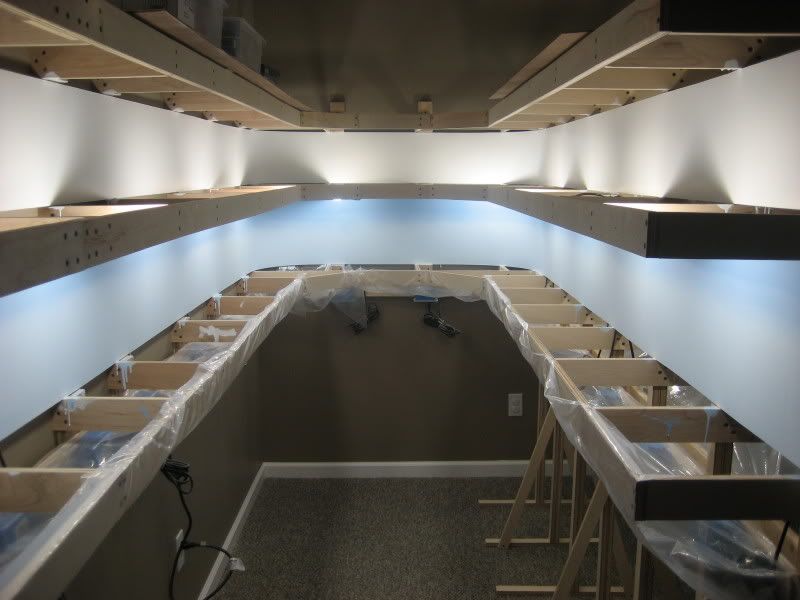
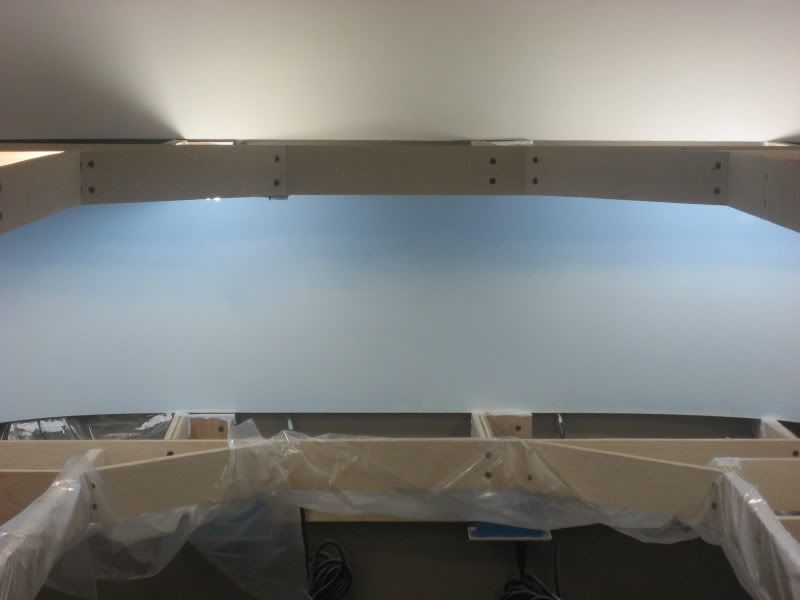
Here is a view looking down the peninsula showing the completed lighting. The newly installed lights are in the aisle to the right above the plastic storage bins that have managed to take up residence in the train room:
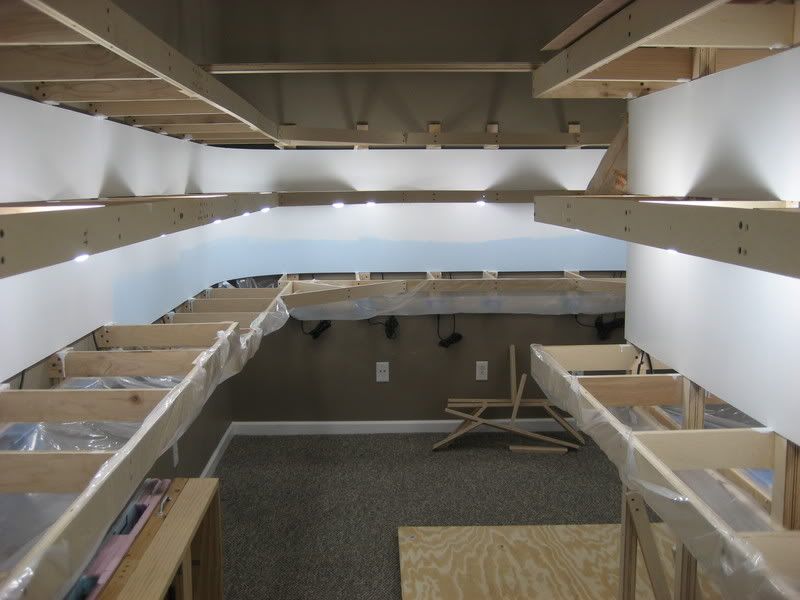
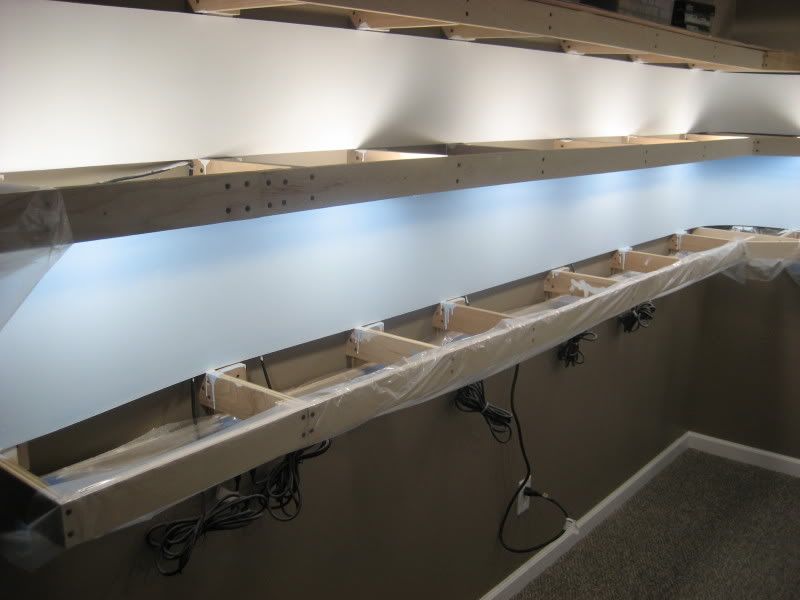
Looking up the back aisle towards where I stood to take the previous picture. The new lights are to the immediate left, and you can see the two sheets of 4x4' plywood that are scheduled to become the base of the helix in the next few days:
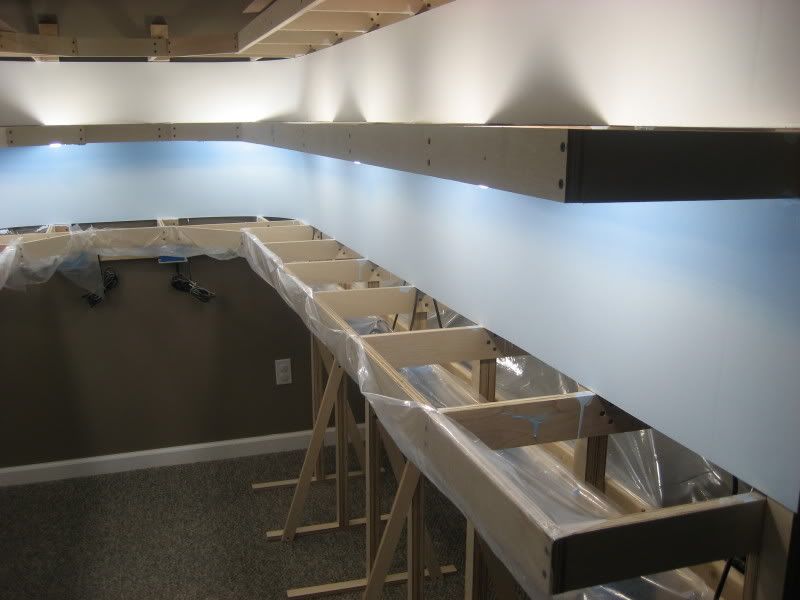
Looking up the front aisle towards the future helix location. The backdrops on the lower level here have been painted with two shades of sky blue; the backdrop in the distance has some light blue on the lower half of the backdrop and will eventually be coated with both shades of sky blue as well:
This article shows how I install one of the light fixtures on the lower level of the N-scale CSX Dixie Line layout. There are 31 of these fixtures on the lower level; the same number will eventually be installed on the upper level as well. At about $6 per fixture (including a compact fluorescent bulb), the cost of the lighting is about $180 per level.
I have included highly detailed step-by-step instructions with lots of photos. Although many of these steps may seem quite obvious, I have included them with the hope that they may be helpful to future modelers.
Step-by-Step in Pictures
Step 1 The following picture shows the materials used to install one light fixture including (clockwise from top):
Step 2 Begin by marking the location of the light fixtures. For the geometry of my layout, I found that a 2' distance between lights worked great. I mount the fixtures inside the 1x3" front boards of the layout bench work. The first thing to do is to drill a 7/64" pilot hole for the #14 screw that will hold the fixture to the front board:
Step 3 Next, use a 3/4" #14 screw to attach the 1 1/4" metal conduit hanger to the front board. Note that the square hole on the hanger should be towards the top, so that the bolt used to grip the socket is pointing down. This may seem like a minor point, but after the upper deck is installed, access to the nut on top of the conduit hangar may be difficult in the event the fixture needs to be replaced. As this picture shows, I installed the conduit hanger "upside down" (you can see the square hole on the bottom; I had to go back later and swivel the hanger 180 degrees before installing the socket):
Step 4 I cut a small strip of craft foam and place it inside the conduit hanger before installing the socket. The foam acts as a "gripper" between the hard surfaces of the hanger and socket and insures the socket will not move around after final installation:
Step 5 Before installing the socket, the 15' cord must be run behind the backdrop...
Step 6 ...and behind the power strip along the bottom of the layout (the clear plastic sheeting stapled to the bottom of the layout protects the carpet from drips when the backdrop is painted):
Step 7 Insert the socket into the conduit hanger and tighten the bolt. I only finger tighten the bolt a few threads so that I do not damage the socket. You may need to pry open the hanger a bit to fit the socket inside the hanger and the strip of craft foam. You can also see that I have correctly rotated the hanger so that the nut for the bolt is at the bottom of the fixture for easy access:
Step 8 I use a plastic cable tie to secure the cord to one of the bench work members. This will prevent the cord from hanging down into the visible scenery. I attach the cable tie using a staple gun...
Step 9 ...then trim away the excess with a pair of wire cutters:
Step 10 The CFL bulb is then screwed in to the socket:
Step 11 The excess cable (there will be a lot of excess since the Hemma socket comes with 15' of cord) is then bundled up and secured with the wire tie that came with the socket:
Step 12 Now simply plug in the cord...
Step 13 ...and let there be light!
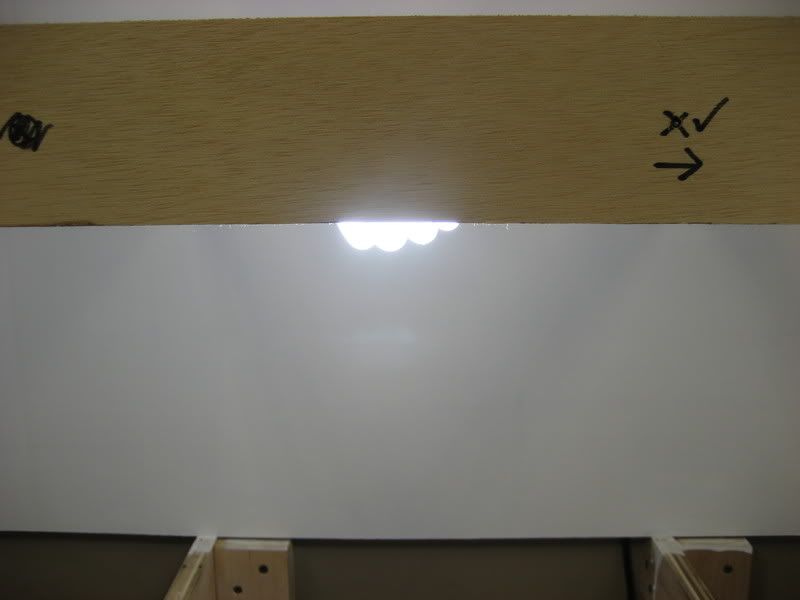
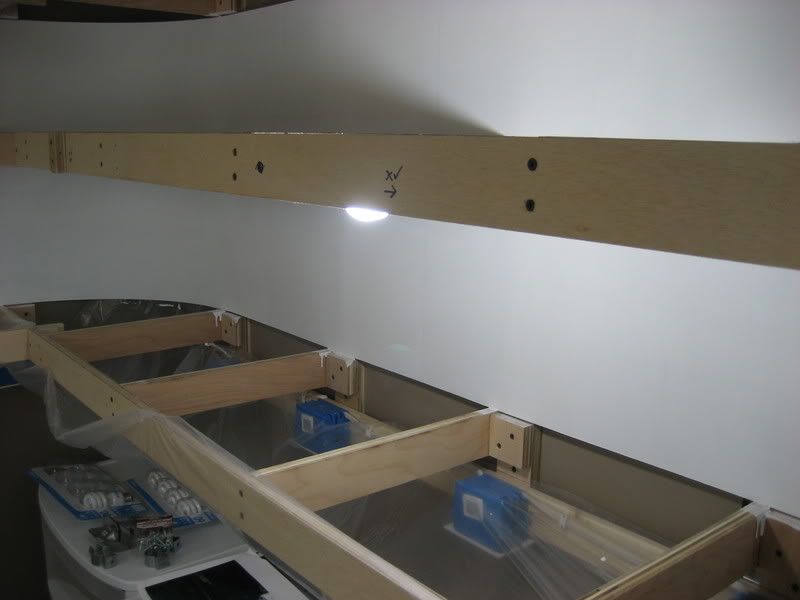
Step 14 The entire fixture is rotated downward so the light bulb "peeks" out below the bench work. This allows light to reach the upper areas of the backdrop more evenly:
Here you can see the bulb when viewed from the front of the layout. The bulb will be hidden from view when the fascia boards are eventually installed:
Here is a wider view of the entire area lit by the fixture we just installed. This area will be brightened considerably when the adjacent fixtures are installed:
Emerson, Georgia is the southernmost modeled area on the CSX Dixie Line layout. Northbound trains departing Atlanta (south staging yard) enter the layout at Emerson. The following aerial map shows some of the features of the CSX W&A Subdivision that will be modeled in Emerson:
Emerson is a city about 40 miles northwest of Atlanta. It has all the feel of a typical north Georgia small town, although over the last few years the long reach of the developer's bulldozer has resulted in huge expanses of red Georgia clay being exposed that will soon be covered by rows of homes and businesses. The city is surrounded by small mountains that dot this part of the state, which gives the community even more of a feel of isolation from the big city to the south that is getting closer every day.
Emerson is also the location of a 7,975 foot long passing siding. The length and location of this siding makes it a popular spot for the CSX AI dispatcher to coordinate meets. With the volume of traffic and the presence of the siding, there is seldom a dull moment for railfanning in Emerson. Emerson is also along a steep southbound grade for trains coming up out of the Etowah River valley just north of town. Southbound trains are really grinding as they come through town, making for an even better railfanning experience.
Let's take a look at some of the prototype features that will be modeled on the layout, starting from the south and moving north.
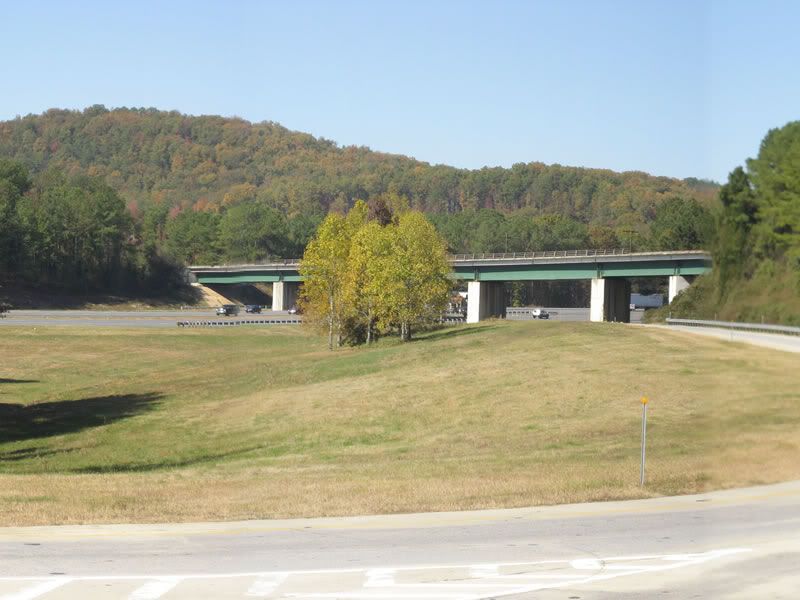
South End Emerson Siding The south end of the Emerson passing siding is not accessible to railfans without trespassing. The following panoramic view was taken just south of the control point at the Emerson-Allatoona Road grade crossing. The signals and switch are just out of view to the north (left) of this photo, while Atlanta is to the south (right). Trains leaving this scene to the right on the layout will be entering the helix headed for the south staging yard (click photo to view entire panorama):
I-75 Bridge Both tracks (main and siding) cross Interstate 75 on a ballasted deck girder bridge. This bridge will be the focal point of the first 8' long section of the Emerson scene. I-75 will be modeled passing under the railroad, with an exit sign and overhead billboard adding to the details. Here you can see a long range view of the railroad bridge:
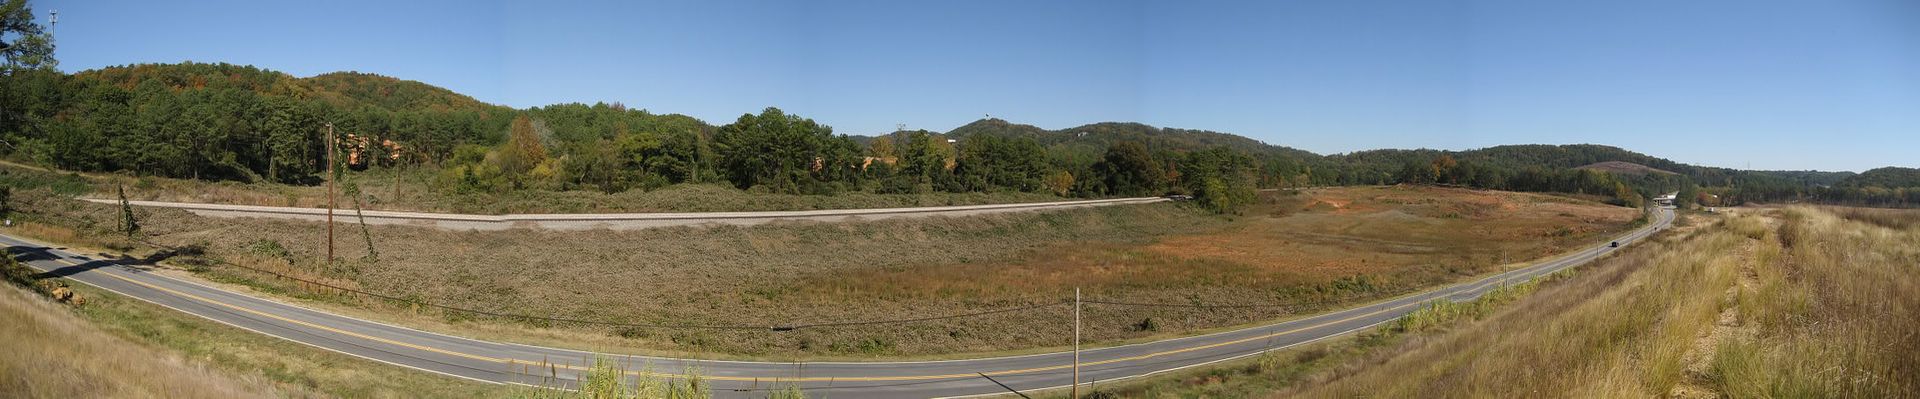
Emerson Curve Between the I-75 bridge and town, the pair of tracks form a long sweeping s-curve simply known as Emerson Curve. This curve will be fitted into the layout as a horseshoe curve at the end of the aisle that divides the Emerson scene. The following panorama shows Emerson Curve in its entirety, with the U.S. 41 overpass just out of view to the left and the I-75 bridge just out of view behind the hill at the far end of the visible track. This hill will provide a view block to break up the continuous view of trains through this part of the layout (click photo to view entire panorama):
Here is a video showing a loaded CSX coke train grinding uphill through Emerson Curve:
As you head north along the tracks from the curve, you enter the actual "downtown" area of Emerson. The following map shows a closer look at this area and some of the features that I would like to model:
U.S. 41 Overpass At the north end of Emerson Curve, the "new" U.S. 41 passes over both the CSX tracks and the "old" U.S. 41/Georgia 293 on a pair of two lane bridges. These bridges offer great modeling opportunity, as well as the cut the tracks pass through beneath the bridge (and those red clay embankments!), the Dixie Highway (Georgia 293) passing beneath the bridge, and of course the abundant kudzu. Here are a few photos of the U.S. 41 overpass from the south and the north, taken on 6/16/2007 when a CSX manifest train was holed up in the siding awaiting a meet:
Sunoco Station "The Slush Puppie Store" There is a Sunoco gas station between GA 293 and the tracks that serves as the general store for Emerson. This spot has earned the nickname "The Slush Puppie Store" by my kids for the cool icy treats they always demand every time we stop in. Somehow I have managed to not get a photo of this store, but here is a loaded coal train grinding its way up the grade through downtown Emerson; the Sunoco station is just out of site to the left:
Old House with Big Tree This old house with this massive oak tree would sure look great on the layout, especially without the Dollar General store mucking up the scene:
Flashing Yellow Light & Grade Crossing The crossroads of beautiful downtown Emerson is marked with a flashing warning light; it is as close as you will get to a traffic signal in this city. Here is a shot of the intersection of GA 293 and Westbrook Avenue looking west towards the old church that now serves as the City of Emerson municipal buildings:
The same intersection looking east showing the Westbrook Avenue grade crossing:
Doug's Place Emerson features exactly one restaurant, and it is Doug's Place right in the middle of town. This building is screaming to be modeled, although I will have to be very creative to fit in the space available. In fact, Doug may have to find a place on the other side of the tracks in my modeled version of Emerson! This great big oak tree in the parking lot for Doug's could be used to obscure the opening in the backdrop that the tracks will pass through just north of Emerson.
North End Emerson Siding The Emerson passing siding ends just north of the grade crossing. Just south of the grade crossing is a set out/repair-in-place (RIP) track where cars are setout that have been flagged by the defect detector about four miles north of here in Cartersville. A few things can be noticed in this photo, all of which I hope to incorporate into the Dixie Line layout: the main track has concrete ties, the siding track has wood ties and is significantly lower than the main track, the RIP track is on the ground and covered with vegetation, and the WA43 milepost marker is next to the bush across the tracks from the tank car sitting on the RIP track:
Looking north from the grade crossing, the switch and northward absolute signals of the North End Emerson control point can easily be spotted:
On the layout, just past this control point the track will disappear through a hole in the backdrop and cross the removable bridge the spans the doorway into the layout room, leaving the Emerson section of the layout and moving into the Etowah River section of the layout.
My CSX Dixie Line layout represents a small section of two CSX subdivisions that run between Atlanta and Nashville via Chattanooga. The CSX W&A Subdivision runs from Atlanta to Chattanooga while the CSX Chattanooga Subdivision completes the journey from Chattanooga to Nashville. The following map shows the overall route and the two modeled areas on the layout (click map to view full size):
There are three reasons why I chose to model this particular piece of the massive CSX Transportation rail network. First of all, there is an incredible amount and variety of traffic along this route, particularly the lower portion of the W&A Sub from Cartersville down to Atlanta which has been labeled the busiest section of single track Class I mainline railroad in the United States. Secondly, the lush scenery in the hills and mountains of northwest Georgia and south central Tennessee provides an ideal setting to watch mile-long trains wind their way along the rails behind the modern marvels that are today's locomotives. And finally, the southeastern railroads seem to be severely underrepresented in the world of model railroads. Hopefully my layout will do justice to all three of these elements!
This evening I jumped in and started painting the sky on the backdrop of the Emerson, GA area of the layout. I started off practicing on some scrap pieces of Masonite backdrop that I had primed, with the intent of perfecting my technique before moving on to the actual backdrop. While I did get the practice pieces looking OK, frustration began to set in as I tried to get every stroke just right. After about 15 minutes, I decided that I had enough of stressing out over picking the perfect sky color and developing the perfect paint technique. I decided the time had come to just jump on in and let it rip. Hey if it looks like garbage, I can just roll a solid coat of blue over the whole thing right?
So jump in I did. Using 4" foam rollers, I rolled on the light blue color over the lower 2/3 of the backdrop and a band of the darker blue across the top 1/3. I only rolled the paints on to about a 2' section of backdrop at a time so that the colors would still be wet for the blending step that follows. Next I used a cheap-o 3" nylon brush to blend the two wet colors together, first using diagonal strokes and then smoothing everything out with some horizontal strokes. Everything looked pretty good, except somehow my transition between the light and darker blue colors was happening right about halfway up the backdrop. This meant that most of my foreground scenery would actually completely hide the lighter blue area, making the whole "two blue" process a waste of time.
To fix this, about halfway through the project I changed the technique a bit. Instead, I first rolled the darker blue along the top of the backdrop, making it no wider than the 4" roller. Then I filled in the entire lower area with the lighter blue, even overlapping the darker blue by about 1/2". I then did the same blending using the 3" wide nylon brush, this time being careful to keep the blended band to no wider than about 4". I then smoothed it out with the horizontal strokes and made a few passes with a foam brush to remove any brush strokes. For whatever reason, this raised the blue-to-blue transition zone to about 4" from the top of the backdrop, which is right where it should be. Other objects such as clouds, hills and mountains will be painted on after the track is in place so the correct placement and perspective occurs.
Here are some photos of the completed sky painted on to the backdrop in the Emerson, GA area of the layout (lower level). These pictures also made me realize I need to actually work on my layout photography skills, since the default settings of the camera lose a lot of the detail and depth of the scene:
A closeup of the backdrop with the two shades of sky blue applied:
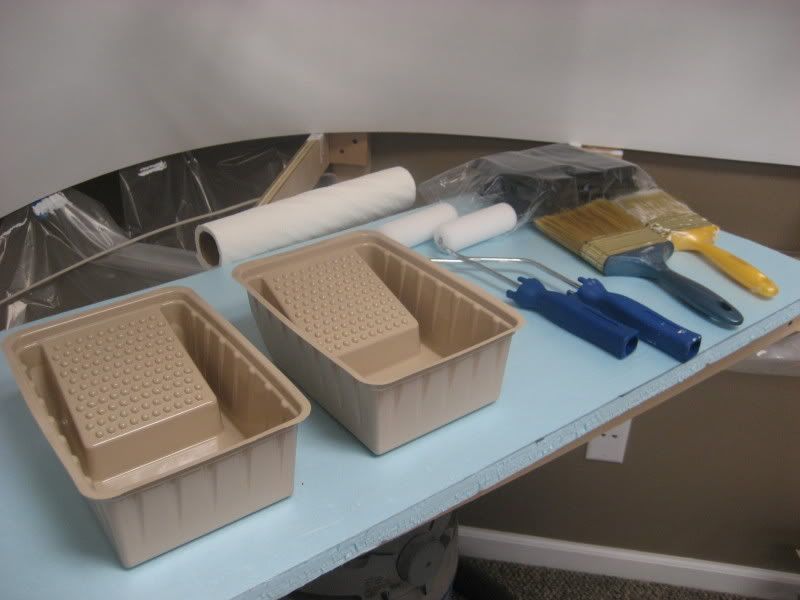
The tools used to paint the sky on the backdrop. The 4" foam rollers take a little getting used to, but produce a super smooth finish:
As I recently reported in my post titled Choosing the Right Sky Color, I have been trying to decide on the correct paint colors to use for painting the sky on my backdrop. Last week, I settled on two Behr shades of blue to use for my sky. While I am probably worrying a bit too much about this, I feel this is an important decision because the backdrop has to set the mood and frame the scene while managing to stay in the background and not distract from the real stars of the show: the trains and foreground scenery.
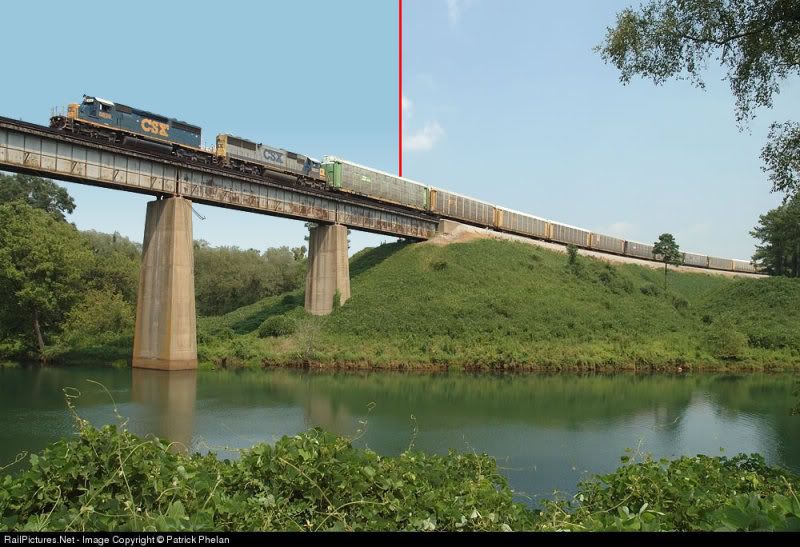
Thanks to the wonders of computer graphics, I have a way to simulate my backdrop sky using real paint colors on an actual prototype photo. Since I am trying to stay as low-budget as possible, I decided to use the flat latex paint available at Wal-Mart for $8 a gallon. So I took my Behr paint samples to Wal-Mart and had the comparable colors matched and mixed. Using these colors in my simulated sky, I found them to be a better match (on the computer) than the Behr colors I originally settled on:
In the above photo of a CSX train on the W&A Subdivision crossing the Etowah River near Cartersville, GA, the left half of the sky has been digitally created using the two shades of blue paint I purchased at Wal-Mart; the right half is the original sky from the photo. The match is nearly identical, especially the lighter blue in the lower sky at the horizon. For those keeping score at home, the colors I finally selected are:
Darker Blue (upper sky): Wal-Mart ColorPlace #91444 Cornflower Lighter Blue (lower sky): Wal-Mart ColorPlace #92442 Blue Pearl
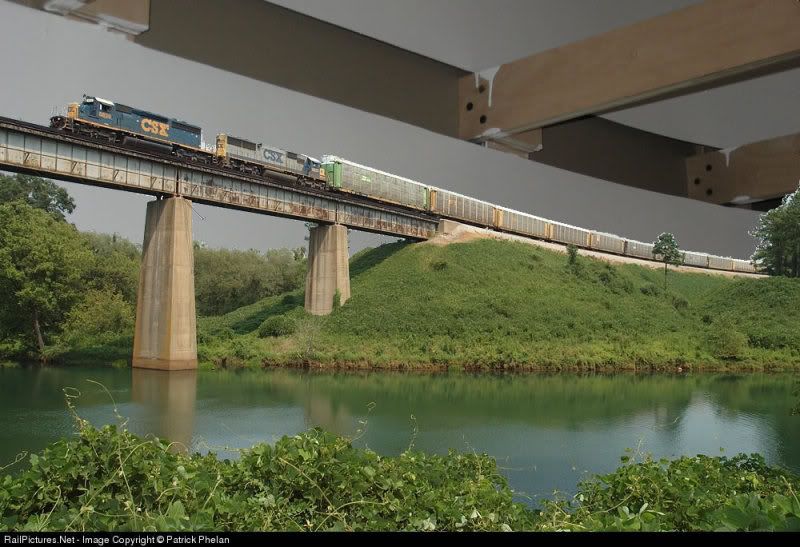
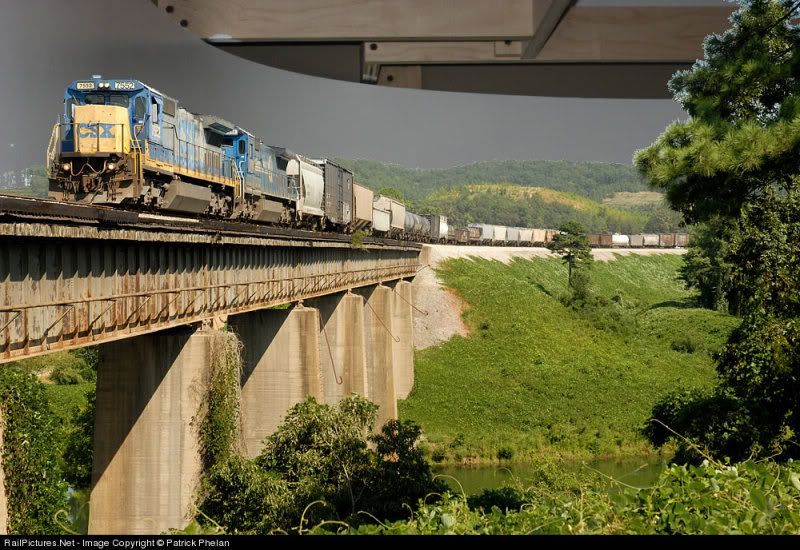
And just for fun, I took a few photos of my benchwork and overlaid them with prototype photos of the same bridge scene. This gives a pretty good idea of the scene I am trying to create and how it will look on the Dixie Line layout:
Original photos are from RailPictures.Net and are copyrighted by the photographer as indicated at the bottom of each photo.