
Joints
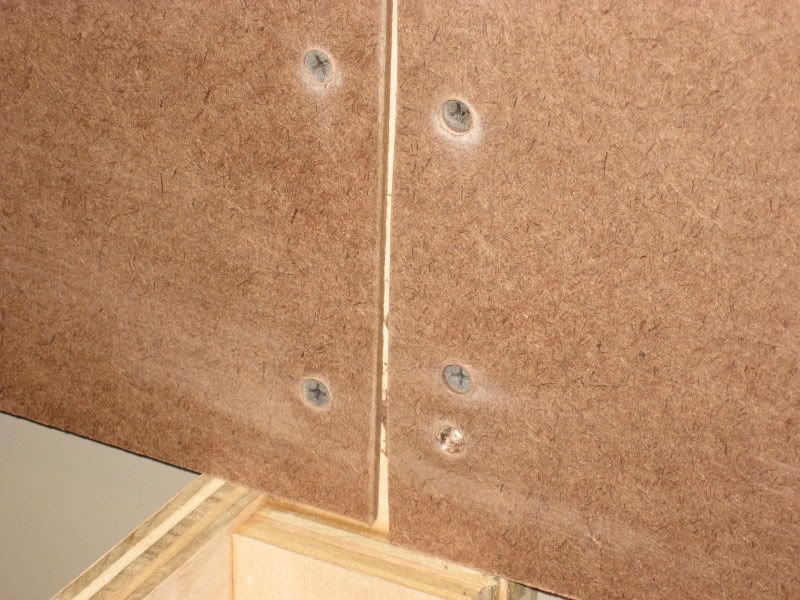
Here is a typical joint on the backdrop where two 1/8" hardboard panels come together. The panels are secured to the wall brackets with five 1 1/4" drywall screws along each side of the joint:

This closeup view of the joint between the two panels clearly shows how the screw heads are countersunk below the surface of the hardboard so the holes can be filled with drywall compound and finished to a smooth surface. The vacant hole at the bottom right is where a screw was protruding above the surface of the hardboard. A new, properly countersunk hole was drilled immediately above the bad one and a new screw was driven. Also note that I have made a pass over the screw holes with a sander because the drilling creates a small ridge that must be removed before the hole can be filled with compound:
Before applying any tape, any gaps and screw holes should be filled in to provide a stronger finished joint. I allow the "prefill" to dry overnight before moving to the next step:

After the "prefill" has dried overnight, I make a pass with the sander to smooth out the joint area. I then apply a piece of fiberglass mesh joint tape to the seam. When covered with drywall compound, this tape will cause the joint to resist cracking as the panels expand and contract throughout the seasons. This particular brand of fiberglass joint tape is extra thin, which I thought would be a good idea since I will also be using paper tape over the fiberglass mesh tape:

Here is a closeup view of the fiberglass mesh tape applied to the joint between the two panels. In this view, you can clearly see where the ridges caused by drilling the pilot holes for the drywall screws were sanded down during a previous step:

To apply the paper tape to the joint, I first applied a thin layer of drywall compound (mud) to the length of the joint with a 6" knife. I then embedded the paper tape in the mud by hand, lightly pressed in into the mud with my fingers, and then made a few passes with the knife to securely embed the tape in the mud. I tried to feather out the edges between the knife and the hardboard as much as possible, although it can be difficult maneuvering the knife around with all of the benchwork framing close by:

After allowing the tape coat of mud to dry overnight, I came back the next day and applied a second coat. There will be a significant "hump" on the surface of the panels from the tape coat--the goal of this second coat is to add more mud along the sides of the tape (where the hump is) and feather it out as wide as possible so the joint will not be noticeable when painted. For this second coat, I moved sided to side with the same 6" knife used during the tape coat. I am not concerned about the ridges that were left behind because they can easily be scraped and sanded down later:

After letting the second coat of mud dry overnight, I came back and scraped down any ridges and blobs of dried mud and made some light passes with the sander to smooth things out. In typical drywall finishing, a third coat would be necessary. However, after sanding the second coat, the joints were smooth enough to be ready for primer and paint. This is probably because the horizontal strokes I used to apply the second coat of mud (necessitated by the benchwork framing) resulted in more mud being applied than if I had used the usual vertical strokes:

Here is the finished joint with the first coat of primer applied. Because of the dark color of the hardboard, a second coat of primer will be required for complete coverage. However, you can clearly see how the joint appears completely smooth, with no evidence of the joint, screw holes or tape visible:

Screws
This closeup view shows a screw head that has not properly been countersunk below the surface of the hardboard backdrop panel. Since we want the backdrop to appear as a continuous, smooth surface, this screw will need to be redone:

To fix the screw, a new properly countersunk hole is drilled immediately above the old location, and a new screw is inserted in the hole. You can see how this screw head sits well below the surface of the hardboard panel when the hole has been drilled correctly. Both holes can now be easily filled and sanded so they will be invisible on the finished backdrop:

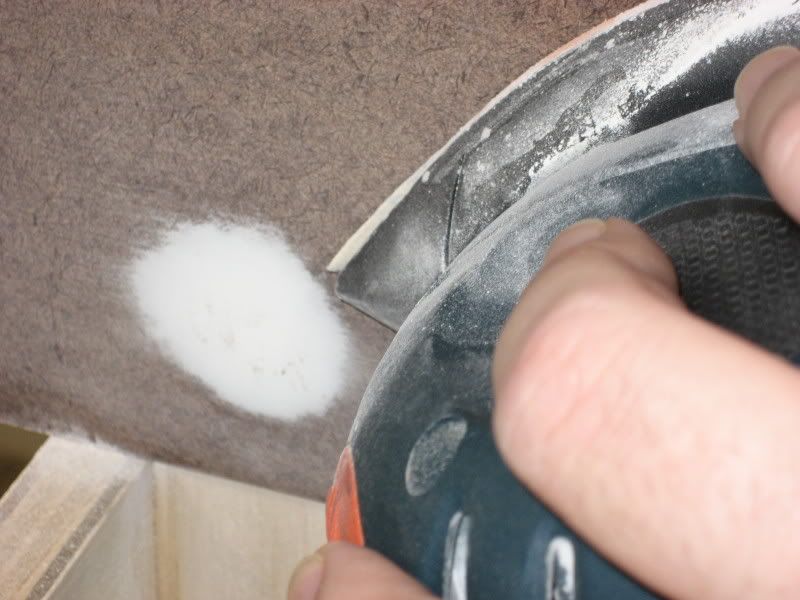
The screw hole is filled with drywall mud. After drying overnight, the surface is sanded (I used a Black & Decker "mouse" sander) so the edges of the mud are feathered nicely into the surrounding area:
.

