
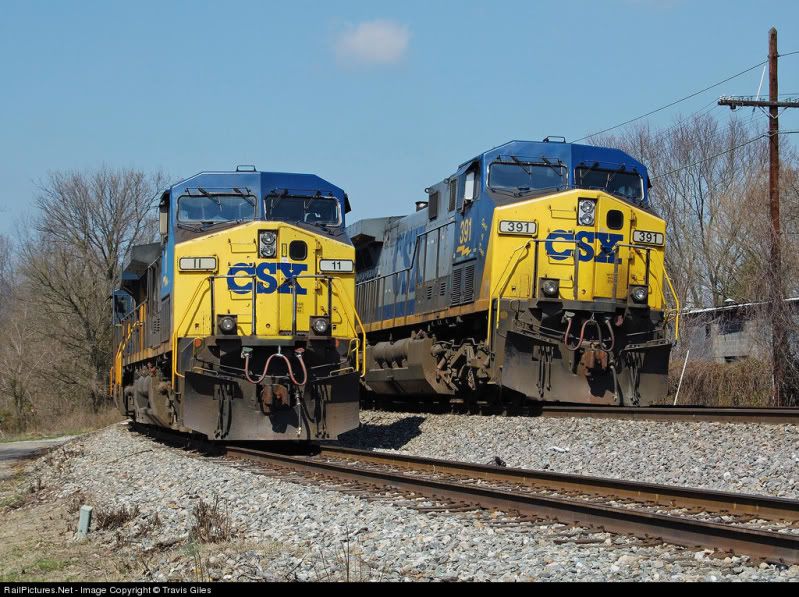
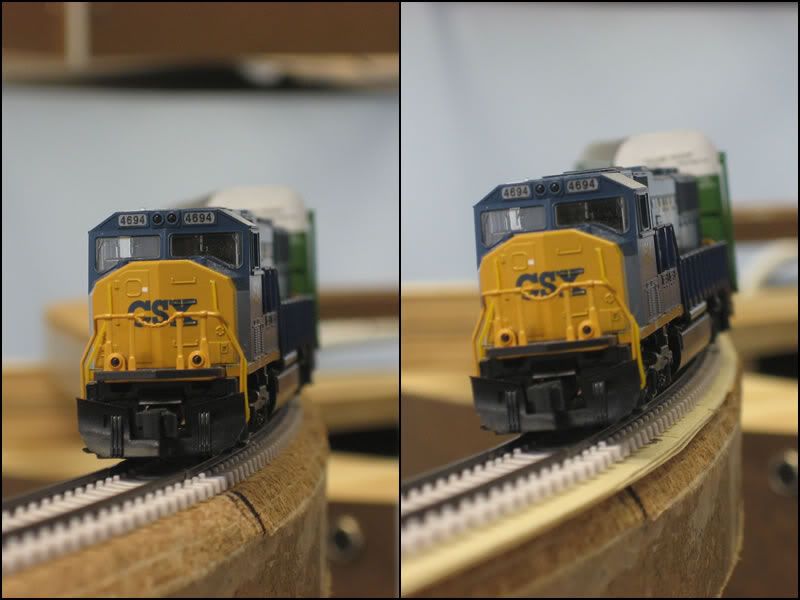
The train on the left is on the flat siding track while the train on the right is on one of the superelevated main tracks. I believe superelevating curves on a model railroad is one of the simplest ways to boost realism on a layout. I am using the technique published in Model Railroader and documented by Michael Highsmith on his Ranier Great Western model railroad website. This technique uses narrow strips of regular masking tape placed under the outside rail of the curved track. I tried this technique out on my test layout and found the results to be outstanding, as you can see by this video I included in a previous post. The following steps show how I superelevated the first track installed on the actual CSX Dixie Line layout.
Step-by-Step
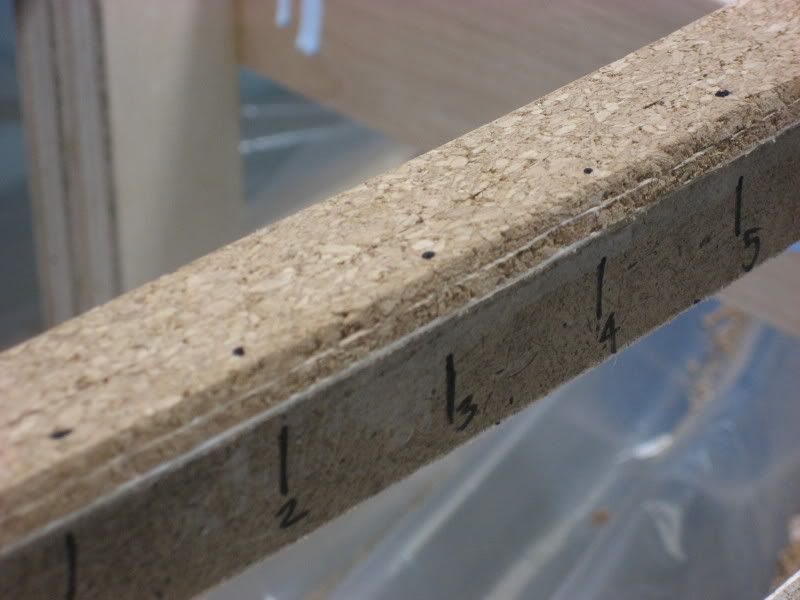
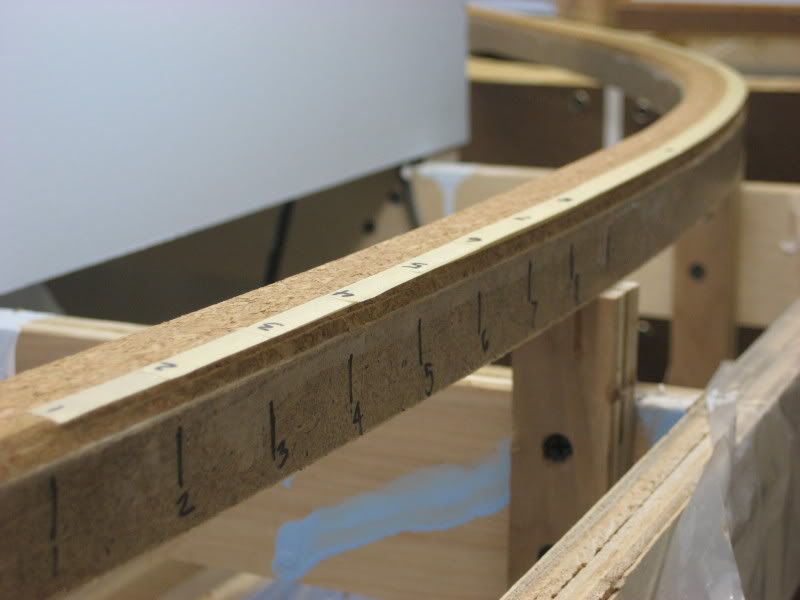
Step 1 Just as you must use easements when laying out curved track on your layout, you must also include vertical easements between the flat/level track and the superelevated track. The layered tape approach allows you to easily build these vertical transitions. First, you need to mark both ends of the superelevated curve on your roadbed. Then, starting at the ends of the curve and working in, make additional marks every one inch until you have eight marks on each end of the curve. This will indicate where each of the eight layers of tape should begin. In this picture, you can see where I have marked my roadbed (the curve starts at the #1 mark and continues to the right):

Step 2 I also marked a series of dots 3/16" from the track centerline along the superelevated curve. These marks indicate where the outside rail of my track is located and will be used to align the edge of the strips of masking tape:
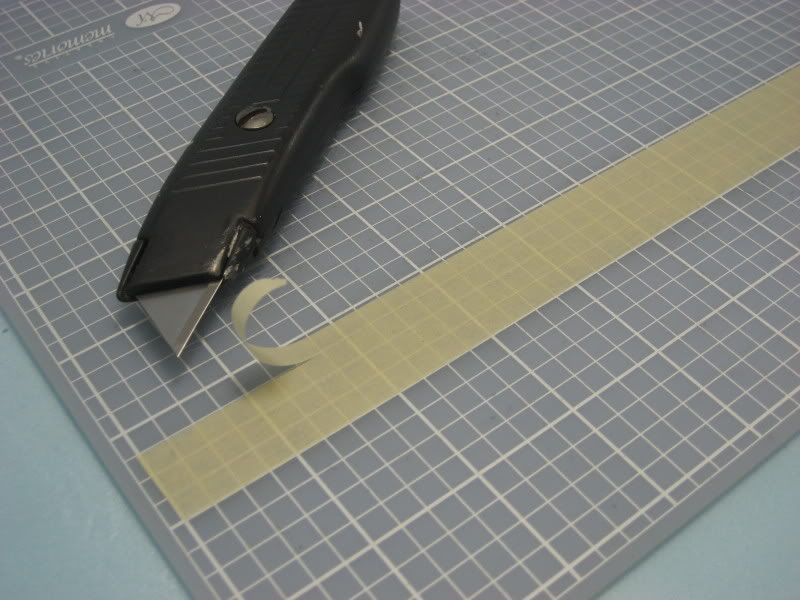
Step 3 I then cut lengths of ordinary 1" wide painters masking tape into strips 1/4" wide. I selected a high tack masking tape so there would be good adhesion to the cork roadbed:
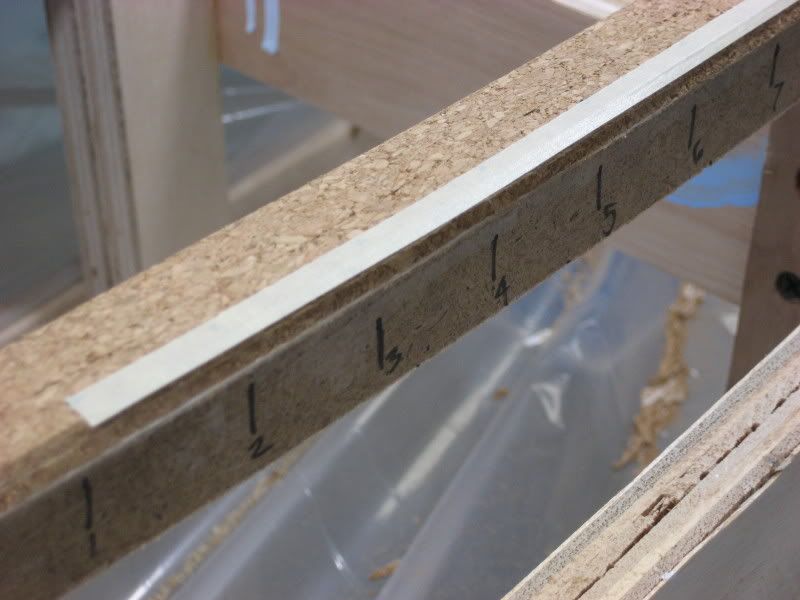
Step 4 I then began laying the strips of tape along the curve to be superelevated, starting at the #1 mark and with the inner edge of the tape aligned with the dots that denote the outside rail. Continue laying the first strip of tape until you reach the #1 mark at the opposite end of the curve:
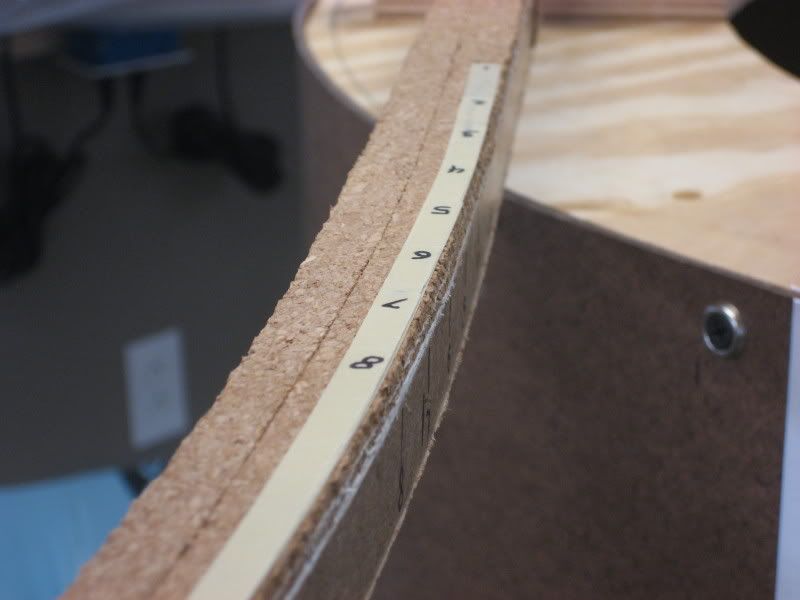
Step 5 Start laying the she second strip of tape at the #2 mark and end at the opposite #2 mark, then repeat the process with all eight layers of tape. The staggered starts of each strip of tape are what creates the vertical easements. Here is a closeup of all eight layers at the start of my superelevated curve:

The tape continues around the curve:
The tape ends at the opposite end of the curve:
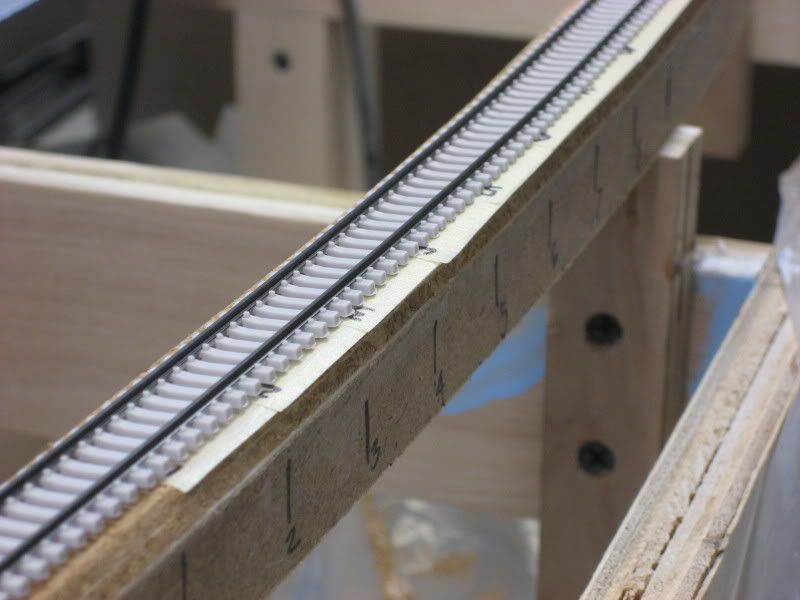
Step 6 The track can now be installed with the outside rail aligned with the inside edge of the layers of tape. The excess tape will be trimmed away after the track has been permanently fastened to the roadbed:
Here is a side-by-side comparison showing a train on the curve both before and after the superelevation that was performed in the above steps:
.

