Sunday, April 12, 2009

Layout Progress as of 4/12/2009

This week saw a major milestone reached on the N-Scale CSX Dixie Line layout as the first pice of track was laid on Sunday April 7, 2009. Construction of the layout began on July 24, 2008, so it took just a little more than eight months to get the first track installed. And with track installed, how could I resist running an actual train? I attached some temporary bus wires to the permanent track feeders and fired up the Digitrax system to run an intermodal train I threw together. Of course, the occasion called for a video so I manned the camera while my four year old son grabbed the throttle and ran the first train over the newly installed track:


I also accomplished a few other significant tasks this week. First, I settled on a method for superelevating the mainline curves on the layout. The technique I am using to superelevate curves was published in Model Railroader and recommended by several members on Trainboard. I posted a detailed step-by-step article on how I superelevated the first mainline curve on the layout. Next, I devised a near goof-proof method for soldering feeder wires to my flextrack. Considering that each piece of flextrack will need a pair of feeders and my soldering skills leave much to be desired, this was a very important accomplishment. Again, I posted a detailed step-by-step article on how I solder the feeder wires to the flex track. Finally, I decided to use Micro Engineering flex track for all of my trackwork. I have always used Atlas flextrack in the past and really like their code 55 offering, but I purchased some Micro Engineering track because it was the only product available with concrete ties. After working out some kinks with the Micro Engineering flextrack (literally!), I have decided that I really like the stuff and will be using it entirely on the layout, not just in the areas where CSX employs concrete ties. The upcoming weeks call for completing the trackwork in the Emerson area of the layout. This will require a lot of soldering, track bending and caulking, but after running that first train, I can say the results are well worth the effort!

Photos

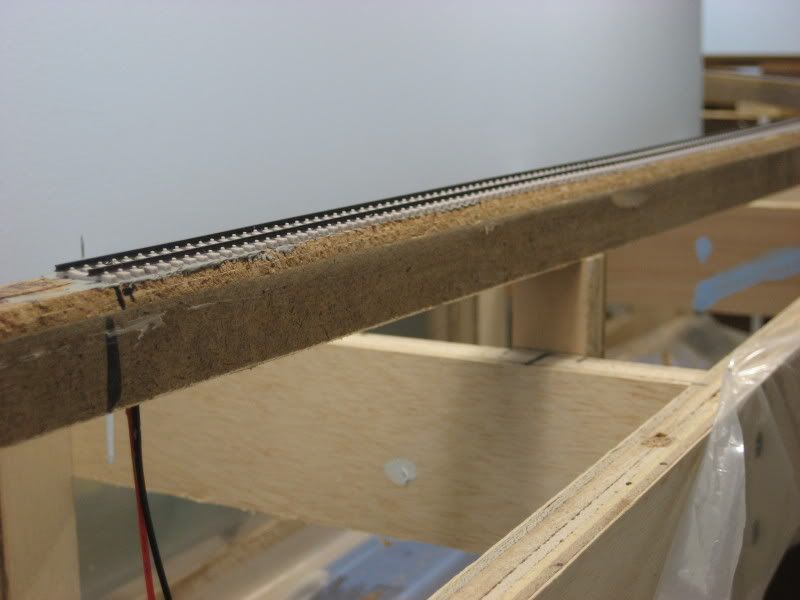
First section of Micro Engineering code 55 concrete tie flex track installed immediately south of the turnout for the south end of the Emerson passing siding. All track is attached using grey DAP acrylic latex caulk. The clamps are very loosely secured just enough to hold the track down while the caulk sets up:


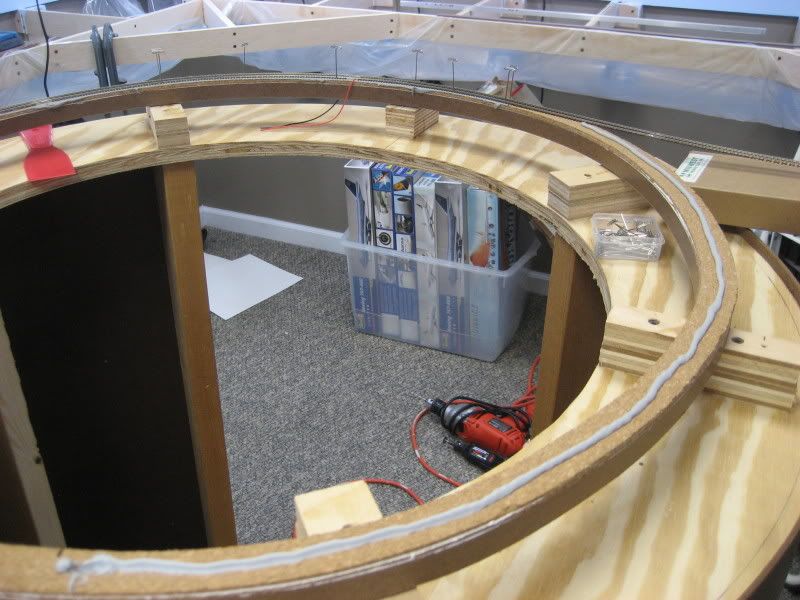
Laying the Atlas code 55 flex track in the temporary staging area built where the future helix will be located. The first picture shows the bead of caulk laid down, the second picture shows the track pressed into the caulk and held in place with T-pins. These pins are probably not necessary since the caulk has a lot of grab to it. In fact, the entire section of springy flextrack (which is along a tight 15" radius curve here) was held in place just fine by the caulk alone, but I added the T-pins just in case:


Here is the first turnout to be installed, which is an Atlas code 55 #10 turnout at the south end of the Emerson passing siding. I will be using a computerized CTC system, so each turnout will be its own detection block (aka a control point). As such, the turnouts will have insulated rail joiners all around and needs its own set of feeders. You can see where I have soldered the red and black feeders at the frog end of the turnout; the green wire is used to power the frog and will get the appropriate polarity from the auxiliary contacts of a Tortoise turnout motor. You can also see where I have glued strips of .020" styrene to the bottoms of some of the ties on the turnout. This is necessary because the height of ties on the Atlas code 55 track is about .020" shorter than the ties on the Micro Engineering track:


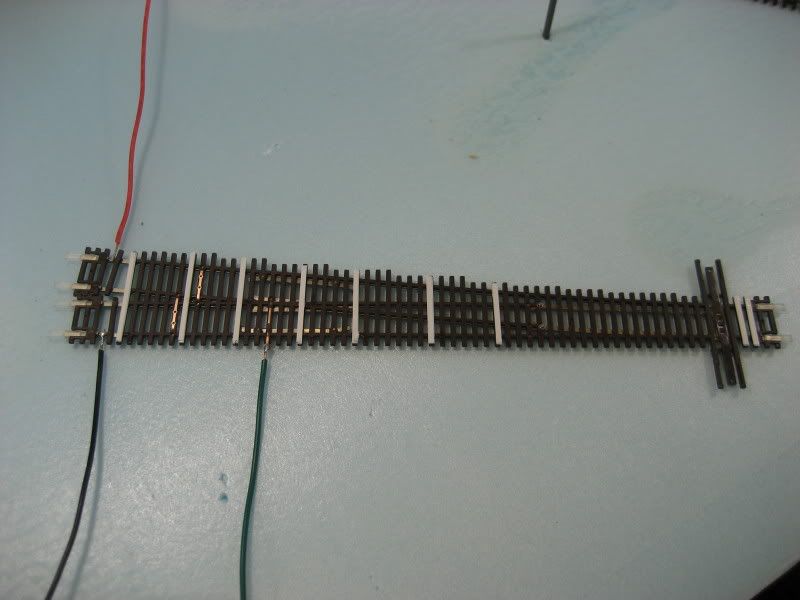
On this photo of the photo of the installed turnout, you can see the temporary bus wire that I installed so that we could run a train over the new trackwork. The turnouts are affixed with the same latex acrylic caulk used for the flextrack. Notice how no caulk is used anywhere near the moving points of the turnout:


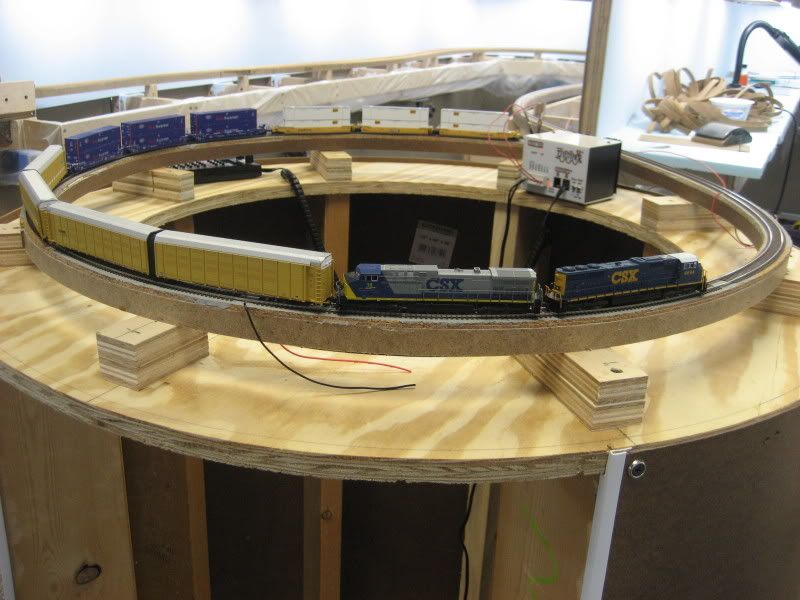
Finally, a few overviews showing all of the completed trackwork. Including the temporary staging area, about 16' of track has been permanently installed. Here is the completed visible mainline at South Emerson:


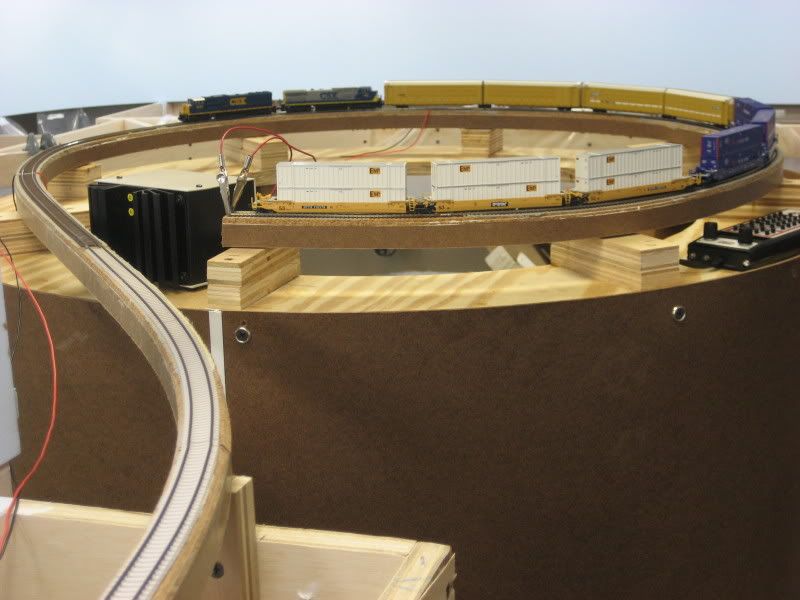
Completed temporary staging track:


.

7 comments:

Pascal said...

That's great !!!!! What a beautiful work and vidéo , dont forget the break !!

Bravo from France

Rangachari Anand said...

Splendid work - I find your work to be a real inspiration. Keep up your how-to articles.

Fred, Yorkville, IL, USA said...

Hi Jamie,

Congratulations on getting your first train to run. What a memorable moment. It looks pretty awesome too! The superelevation makes it look quite realistic. How hard was that to let your son be the first to run a train though? :-) What a way to get him started early in the hobby!

A couple of questions. I'm still trying to decide between Peco and Micro Engineering code 55 track for my N scale layout. Like you, I like the ME track because if it's weathered look. It does pose some problems for curves though. When I laid flex track on my HO layout nearly 30 years ago (and yes, it is still in operation) I soldered together the rail connections that were required to be on curves while the track was still laid out straight. This helped prevent kinks from forming even though the track I used on it too had the ability to keep it's form when bent. Because of it's pre-weathering, ME track would be difficult to do that with. It appears you are using plastic rail joiners between all sections of track. Does that apply when a connection occurs on a curve as well?

For the mainline track, do you intend to remove the weather coating of the top of the ME track? It doesn't appear that you have done that as yet and yet the train seems to run very smoothly. Electrical pickup doesn't seem to be a problem. Prototype mainline track though has more of a shiny look to the top of it, clearly showing it's heavy use, whereas sidings and lesser used track often have a much duller look, like ME track with the weathering applied. Just wondering if you were planning on this type of look on the layout as well, or even just for the advantage of electrical pickup?

Do you plan to use the ME solution to weather coat the turnouts at a later time?

One side note that I was warned about by a member of a club who uses ME track on their club layout. Apparently they have had problems with the weathering coming off when using rolling stock with metal wheels. He said it is most noticeable on some of the curves. With enough use, the coating can even be seen on some of the flanges of the wheels of the cars, proving that this is what was causing the problem. It doesn't peel off, it just wears off due to friction along the insides of the rails. Because of this, on new sections of their club layout they now require that only MicroTrain plastic wheels be used, except on locomotives of course. If a club member now brings in a car with metal wheels they can only run it on the older parts of the layout. Their layout probably gets a lot more use than most, but just thought I would pass this little tidbit along.

And by the way, April 7 was actually a Tuesday, not Sunday. You must have meant April 5 :-) But then what is 2 days when you are talking about 8 months in the making. Was it on Easter day that the first train actually ran?

One final note. Peco also makes code 55 track with concrete ties. It doesn't have the weather coating though of course.

Jamie in Lilburn, Georgia, USA said...

Dont see an email for Fred so I'll respond here. First off thanks on the congratulations--been waiting a while for this day!

-- Joining ME track: I cut the ends of the rails short one one piece of track (leave about 3-4 "empty" ties) and cut the rail long on the adjacent track. Then I slip the long rails into the vacant ties on the first piece of track. I also leave a gap about the thickness of a credit card to allow for expansion/contraction. This requires a set of electrical feeders for each section of track, but I was going to do this anyway. Where I have soldered ME weathered track to Atlas flex, I just remove the weathering from the ends of the rails on the ME track.

-- Tops of Rails: Yes I will be removing the weathering for looks, but it conducts electricity so it could be left on.

-- Weathering Turnouts: I will be weathering using an electrical product called Conductalube. This (and the gap method above) wre suggested by Jim Reisling on TrainBoard.

-- I will be using all metal wheelsets so I can have block detection. However, I am not worried about weathering wearing off the inside of the railhead.

-- Peco does make code 55 concrete tie flextrack, but the tie spacing is for British railroads, so they are spaced too far apart for North American railroads.

Christopher said...

Very inspiring Jamie. Keep up the great work.

ICG2601 said...

Hey Jamie
Looks great I can't wait to get my things done to give it a test run.You have got a really nice layout going there I decided to just get the track down and go with it.

I have one Question for you have you decided on what your average train length will be.I'm going with 30 cars for the ones that have switching to do and the other ones that are straight run thru's will be 40 cars.So keep up the great track work and take care.
Blane

Jamie in Lilburn, Georgia, USA said...

My sidings will each be at least 14' long, so I can run some decent length trains. I think a typical train will be something like 16 autoracks or 24 coal hoppers (+ locos).