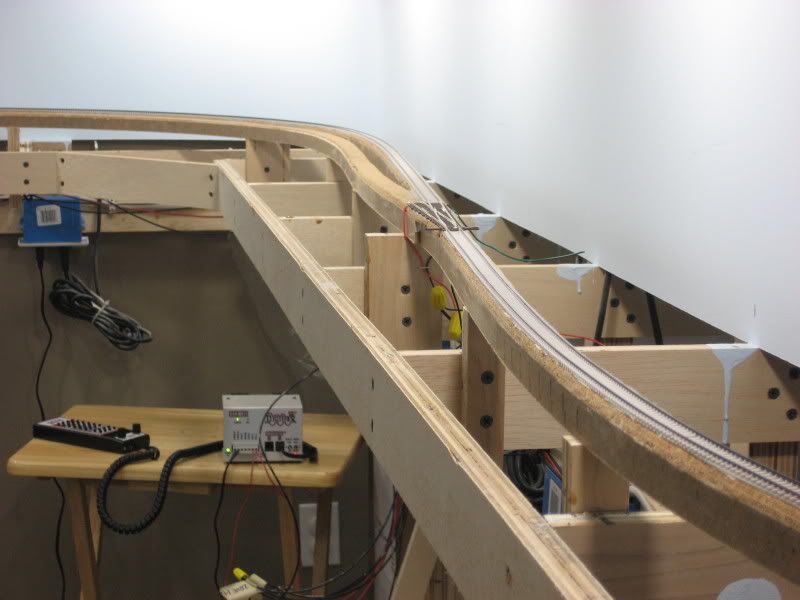
Monday, April 20, 2009

Layout Progress as of 4/20/2009

Trackwork continued on the CSX Dixie Line layout over the last week. The mainline has now been laid from the helix all the way to the turnout at the north end of the Emerson passing siding. Here is CSX Q210 stopped at the current end of track--I am afraid the crew will go "on the law" before the track gang will enable them to proceed any further:


Bus Wires

You can also see in the above picture that I have removed the temporary feeder wires and installed the permanent bus wires and attached all of the track feeders. I am using 14 gauge stranded wire for my bus wires and the flexibility of the stranded wire really paid off when pulling cable around the layout. All wires are attached using wire nuts at the end of a run or soldered joints in the case of a wire splice. All of the bus wires run back to this panel where the DCC components will be installed:


A Digitrax PM-42 power management board and a Digitrax BDL-168 block detection board will be installed on this panel in addition to the DCS-100 booster. In the meantime, the booster will take up residence on the wooden TV table. All of the bus wires are temporarily spliced together and tied into the booster via a pair of good old alligator clips.

Joining Flex Track

This section decsribes how I join two sections of Micro Engineering flex track. This technique was suggested by Jim Reisling on TrainBoard; he uses the method on his N-scale BNSF Oakville Sub layout. Rather than using rail joiners, you cut the rails short on one section of track and cut off the ties from the end of the adjacent section of track. You can then simply slip the rails into the empty ties and you will have a perfectly aligned joint without rail joiners. The following photos show how this works:


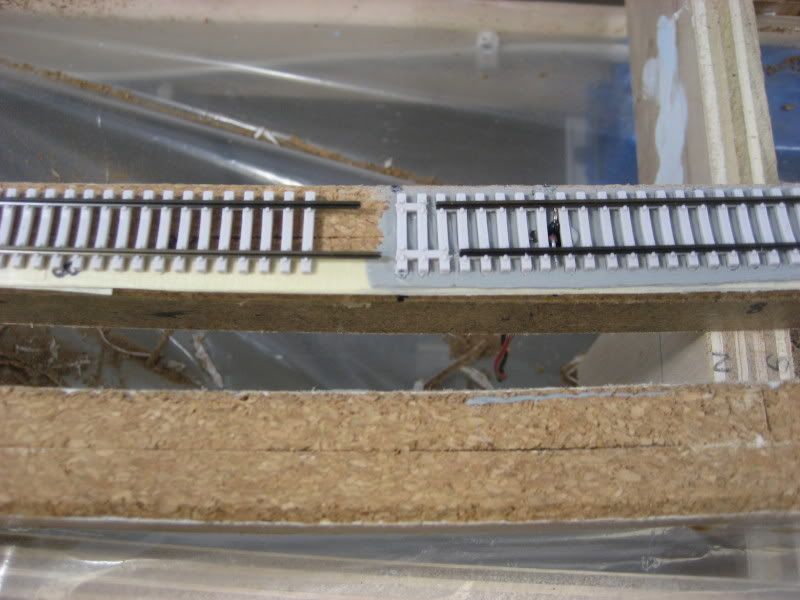
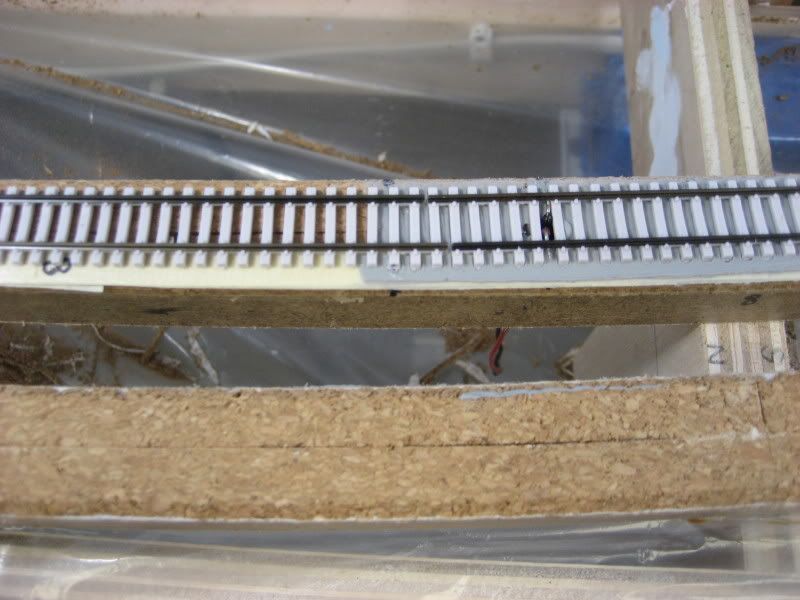
I leave a small gap between the rails to allow for expansion/contraction. This requires a set of feeders to be attached to every section of flex track, but I was planning on doing this anyway to increase electrical reliability.

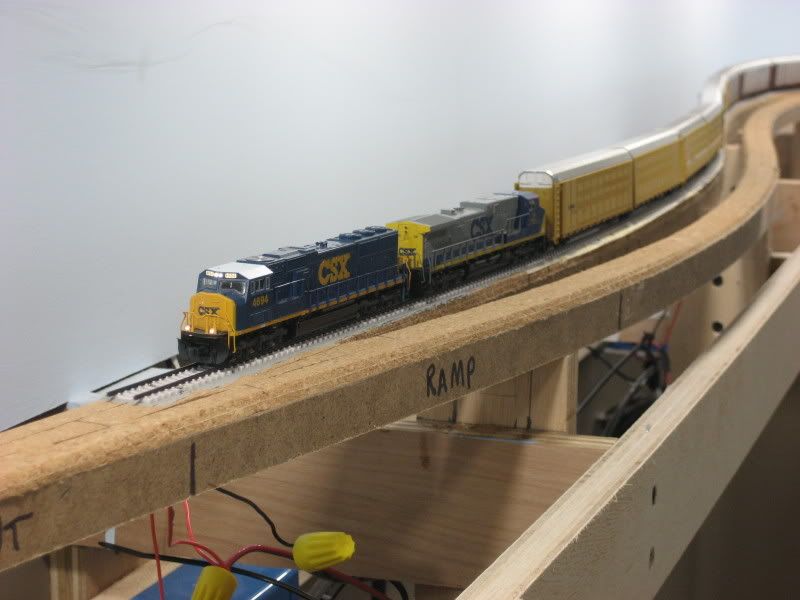
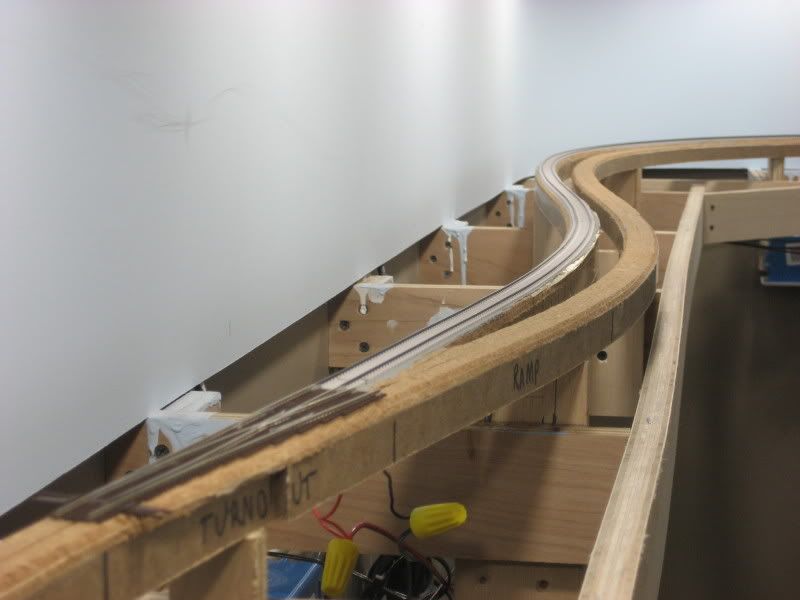
Completed Track So Far

The following photos show the completed mainline beginning where the track emerges from the helix all the way around to the north end of the Emerson passing siding. You can see the turnout at North End Emerson that has been temporarily set in position at the end of the mainline:


.

5 comments:

Shaun said...

Looks good.

I know the ME track holds it's shape better than Atlas Flex track, but do you expect any issues for track gaps that are mid-curve without any joiners soldered on?

Is ME track stiff enough to where you don't even have to worry about it trying to bend out of the curve back to a straight piece?

P.S. I envy the amount of room you have :)

Jamie in Lilburn, Georgia, USA said...

The ME rail keeps the shape that it is bent into. In the 5th photo above, you can't really even see where the gaps are because the rails are perfectly aligned. Well, if you look closely, you can see a tiny bit of misalignment, but that is because I took the picture before fastening the second piece of track with caulk and I had to hold it in place (you can see my thumb!) Once the caulk is down, it is just right. Bit of a click as the wheels pass over it but not a single derailment so far.

Shaun said...

Very cool. How do you like the Concrete Tie flextrack?

It's tempting to replace the atlas flex on my lower level "mountain-y" scene with some.. Looks good.

Jamie in Lilburn, Georgia, USA said...

Love the ME concrete tie flex track. In fact, I like the ME flex so much I am switching to ME for all my track. UPS driver just handed me a case of ME wood tie flex about 15 minutes ago. Expect to see track laid in the siding by this weekend!

Anonymous said...

Jamie,

Just discovered your site a few days ago. I am impressed with what you have done so far and the time in which you've gotten it accomplished. Thanks for sharing! Any thoughts on having your layout on the Atlanta area "Piedmont Pilgrimage" tour later this year? I'm not far away in Alabaster, AL and would love to be able to come check it out in person.

Thanks for the updates ...looking forward to seeing more of your layout's progress!

Sam